How to Connect Public and private subnet in same VPC
Contents
hide
This tutorial will help you to understand the connectivity between the public and private subnet from an example. Here we will create two EC2 servers, First EC2 (Application Server) in a public subnet that can be accessed from the internet and Second EC2 (Database Server) in a private subnet that can be accessible from the Application Server, but not directly from internet
Note: You could see the previous part of this tutorial
- VPC Hands-On Lab -1: – A Complete Guide to create custom VPC in AWS
VPC Hands-On Lab -2
Create two security group for Application server and Database server
- Create two security groups
- Create and configure first security group for the Application Server (i.e. CloudiofyLinuxSG)
Go to the VPC home page, Choose security groups from left menu, Click to Create a security group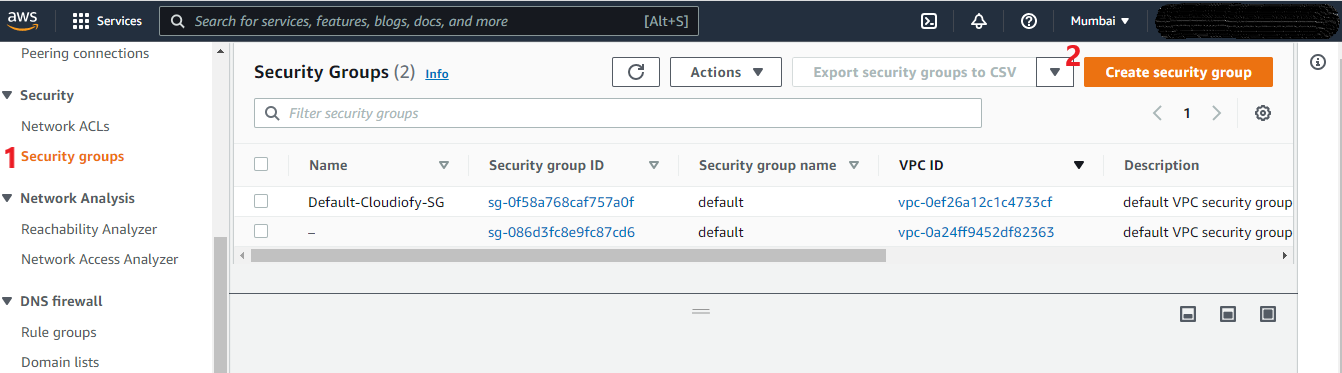
Configure security group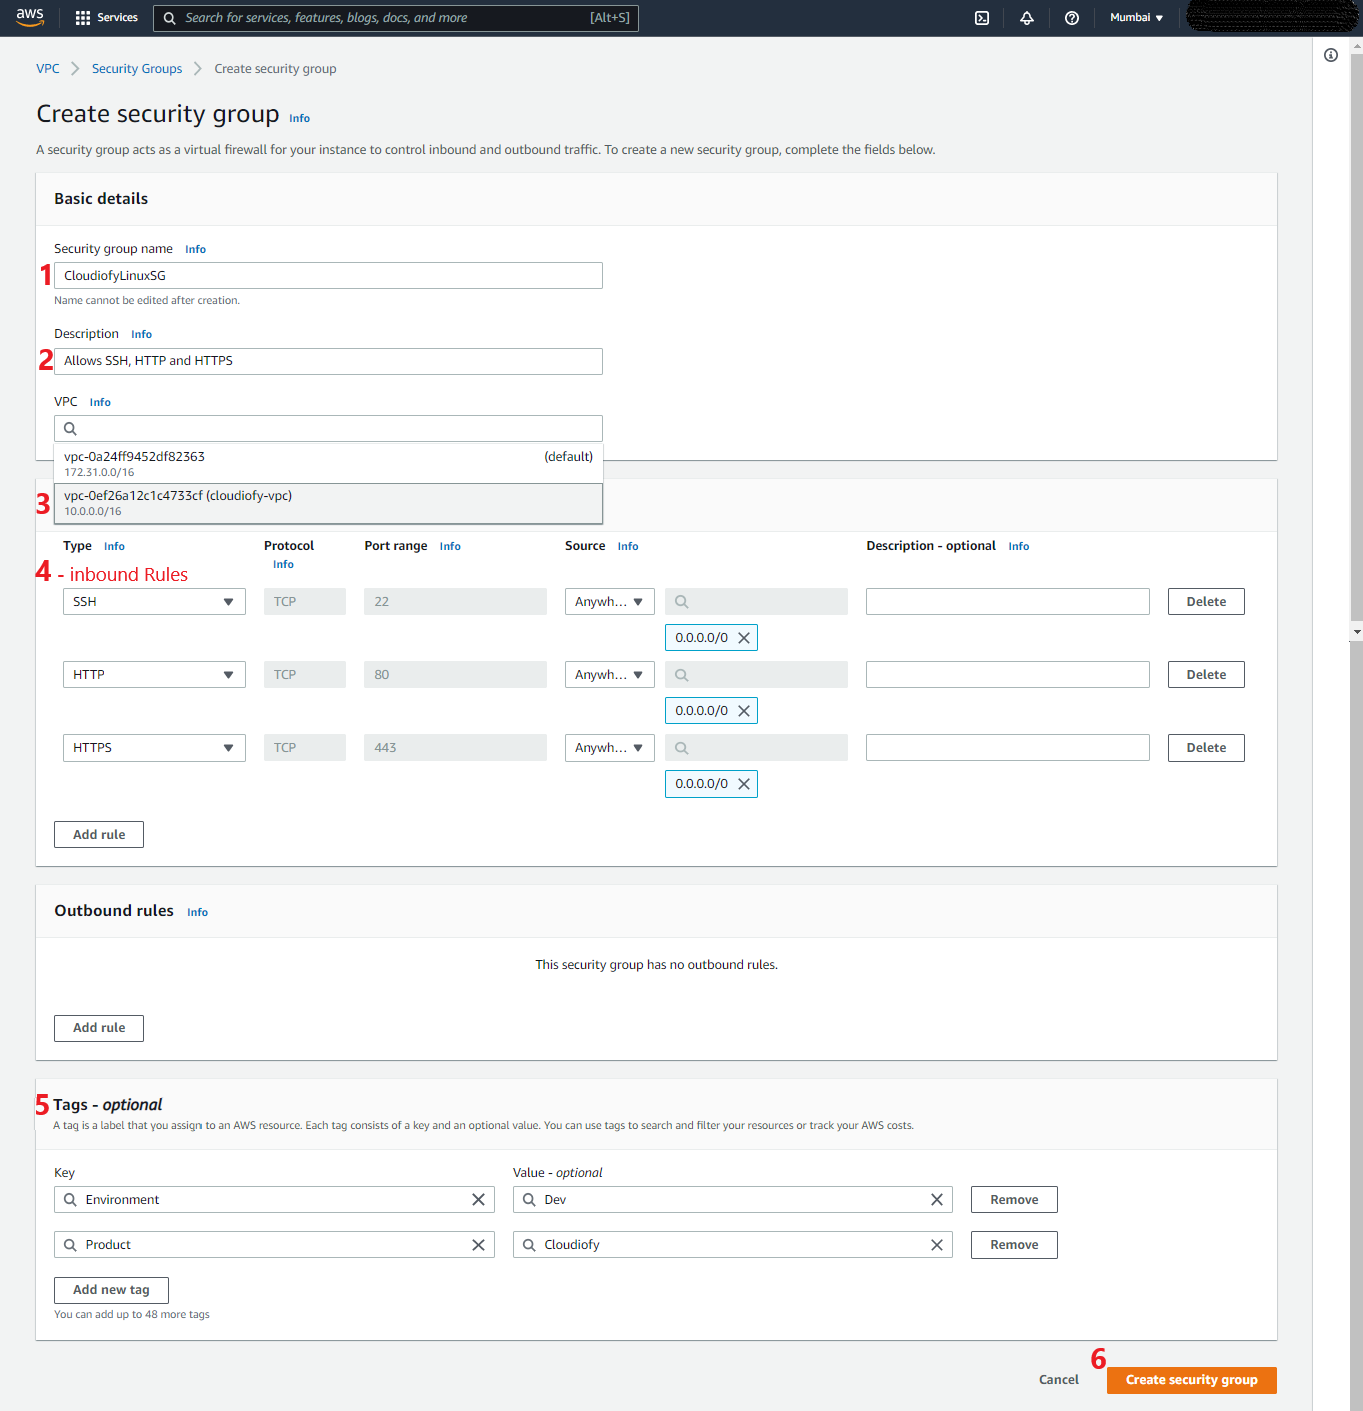
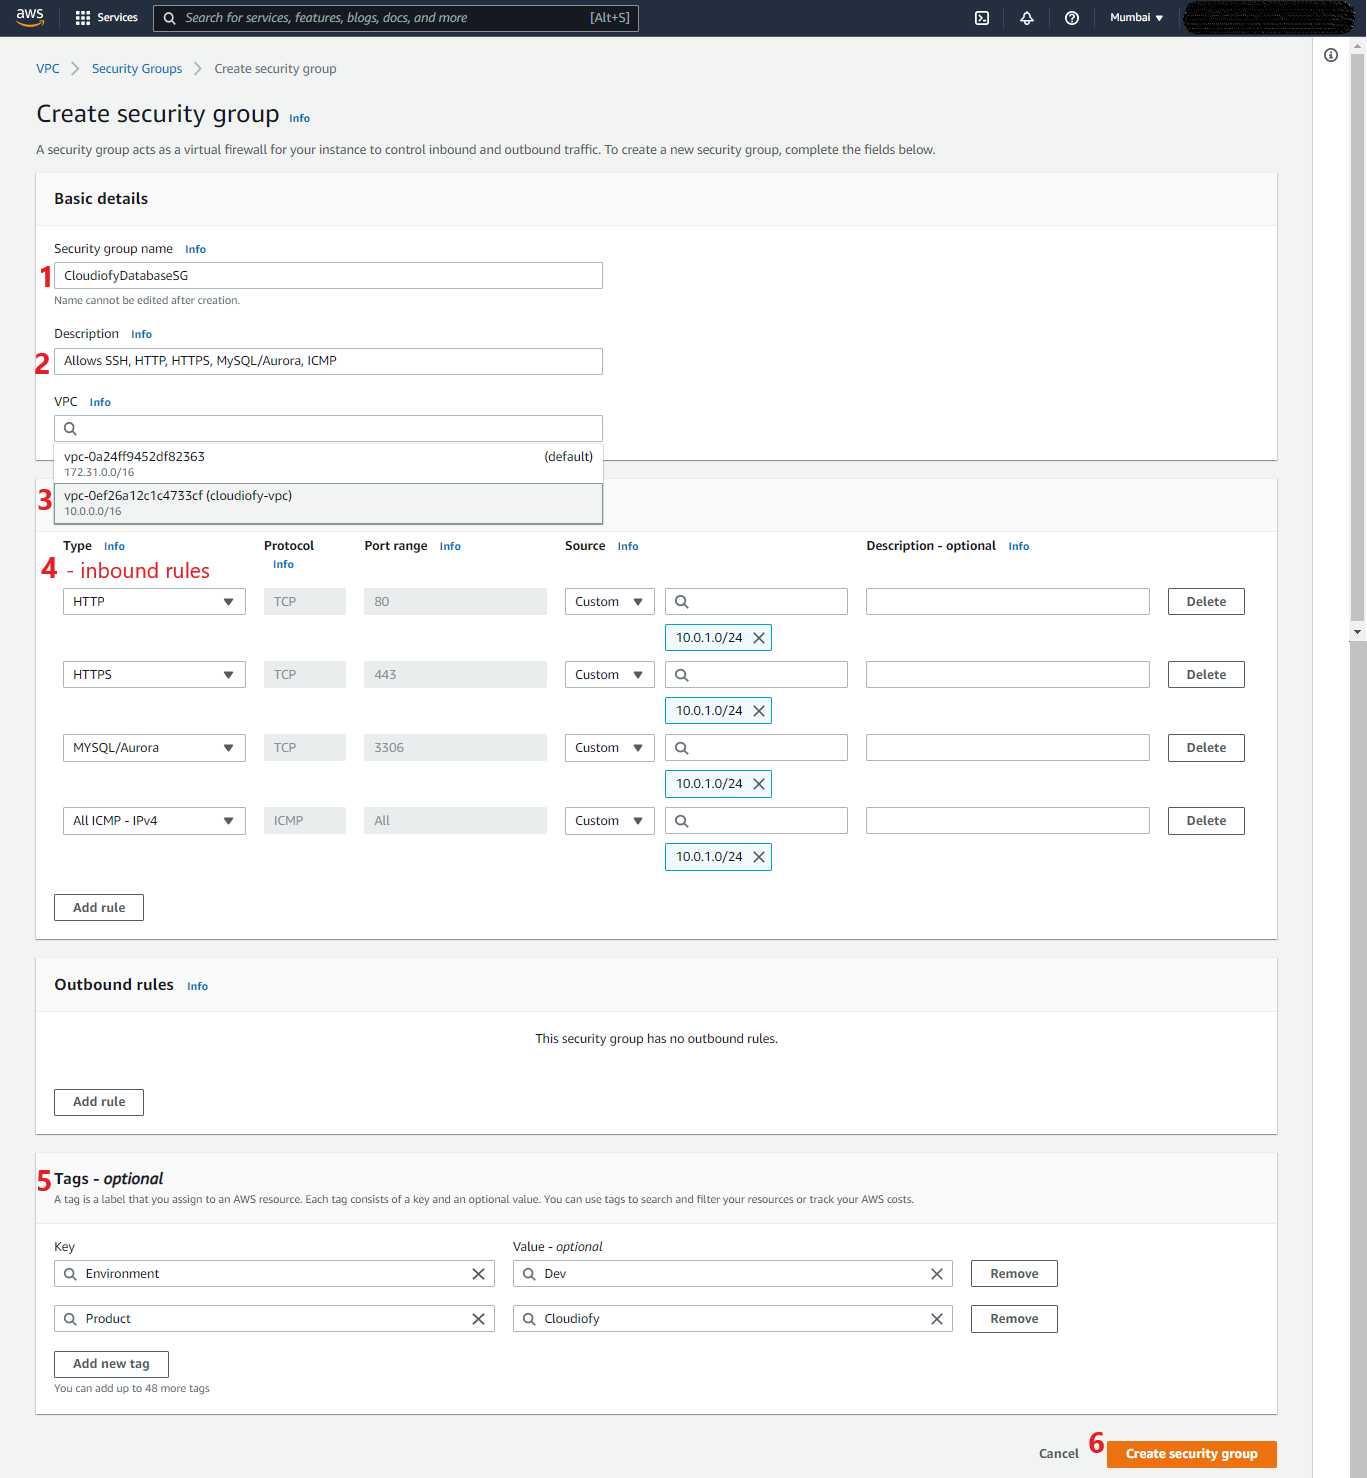
- Create and configure a second security group for Database Server (i.e. CloudiofyDatabaseSG) that allows access from Application Server. For example enabling MySQL/Aurora database port (you could enable it for other databases MSSQL, Oracle, etc..)
- Create and configure first security group for the Application Server (i.e. CloudiofyLinuxSG)
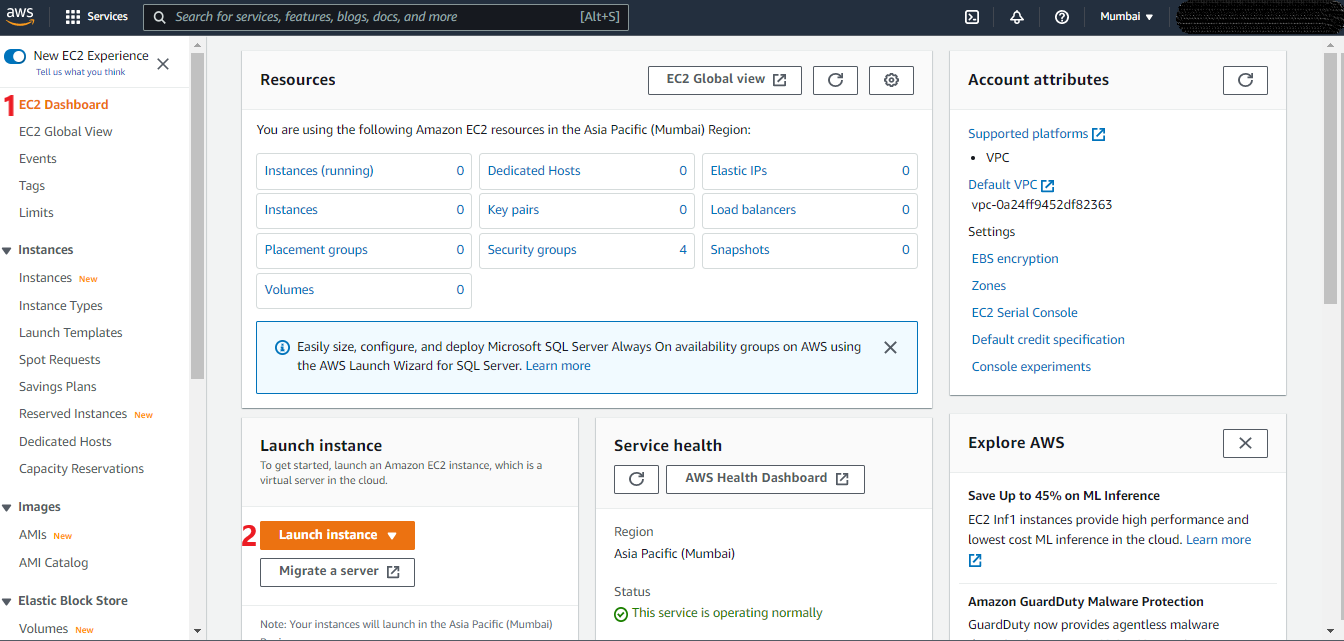
Create two EC2 Linux Server
- Create two EC2 Linux Server in Public and Private subnets
Note: You could see this link to understand How to Create and connect EC2 Linux Instance with old Amazon console UI.
Create Key-pair
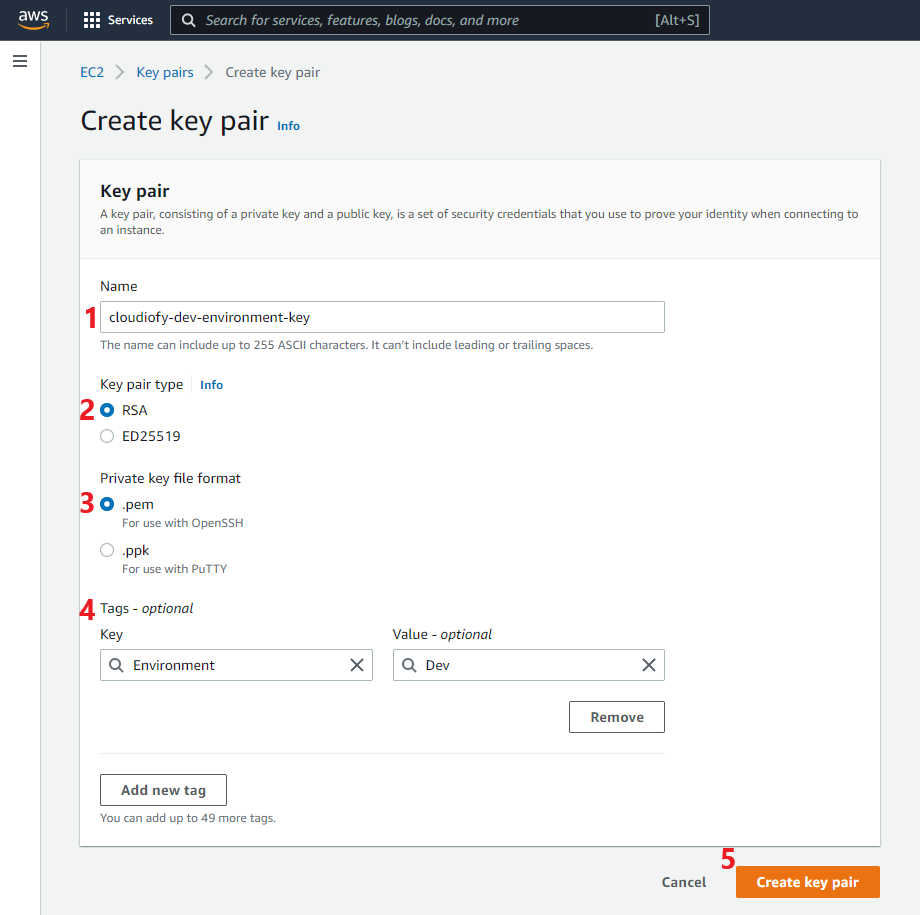
- Create Key-Pair: – A key pair consisting of a public key and a private key. It is a set of security credentials that you need to use when connecting to an Amazon EC2 instance. Amazon EC2 stores the public key on your instance, and you store the private key. For Linux instances, the private key allows you to securely SSH into your instance.
Go to the EC2 home page, Choose Key Pairs from left menu, Click to Create key pair
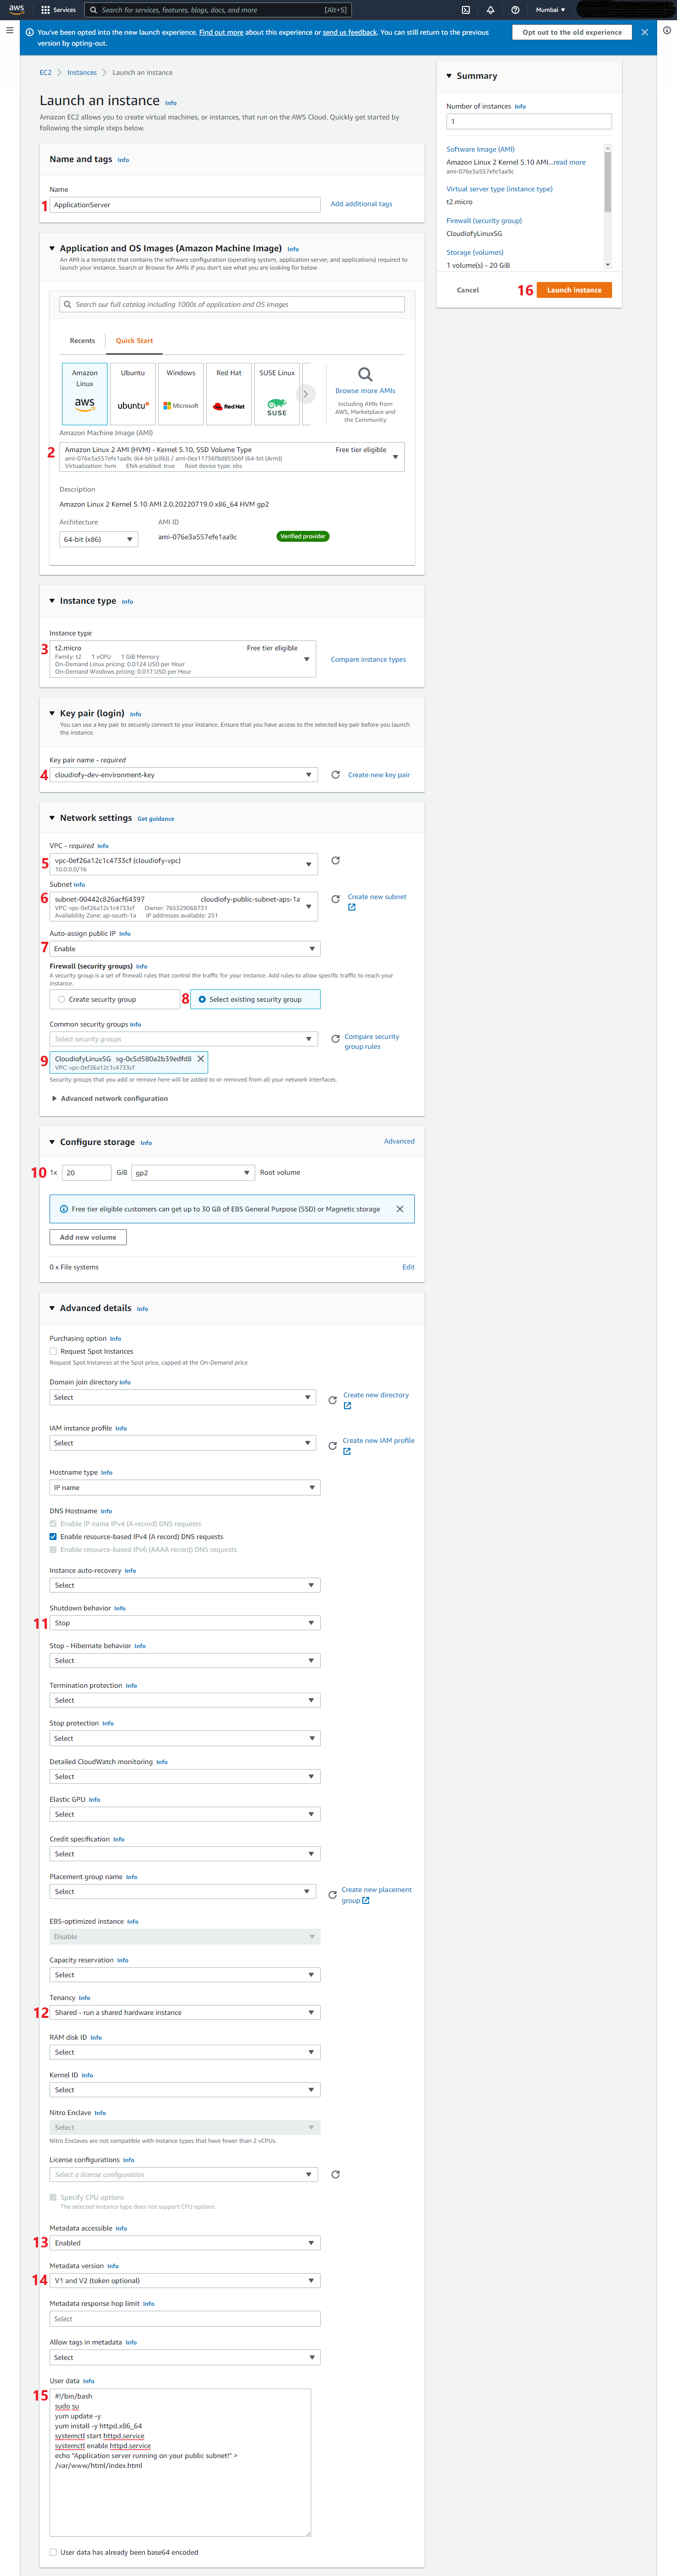
Application server in Public subnet
- Create Application Server: First, create an EC2 Amazon Linux 2 server (i.e. Application Server) associated with your VPC (cloudiofy-vpc) and security group (i.e. CloudiofyLinuxSG). Additionally, added a script to User Data to install Apache web server.
Note: The application server was created and it got a public IP4 address (3.110.181.209) and public IP4 DNS. This IP4 address is dynamically allocated by AWS until we use Elastic IP. You may see different IPs in your case.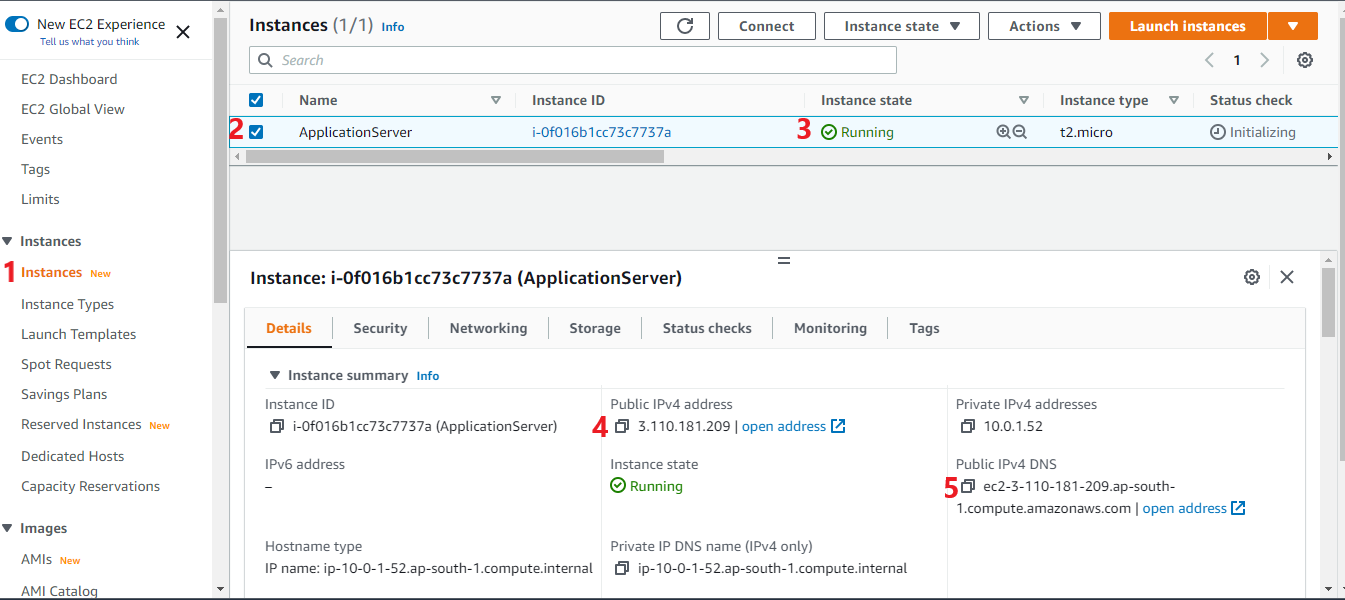
Now you can access your Application server from a web browser. (Note: As SSL is not installed on the server, Use http protocol in the URL)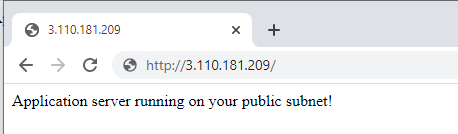
Database server in Private subnet
- Create Database Server: Create second EC2 Amazon Linux 2 server (i.e. Database Server) associated with your VPC (cloudiofy-vpc) and security group (i.e. CloudiofyDatabaseSG)
Note: – This is just a sample database server for demo purpose, you can install MSSQL or Other databases later on.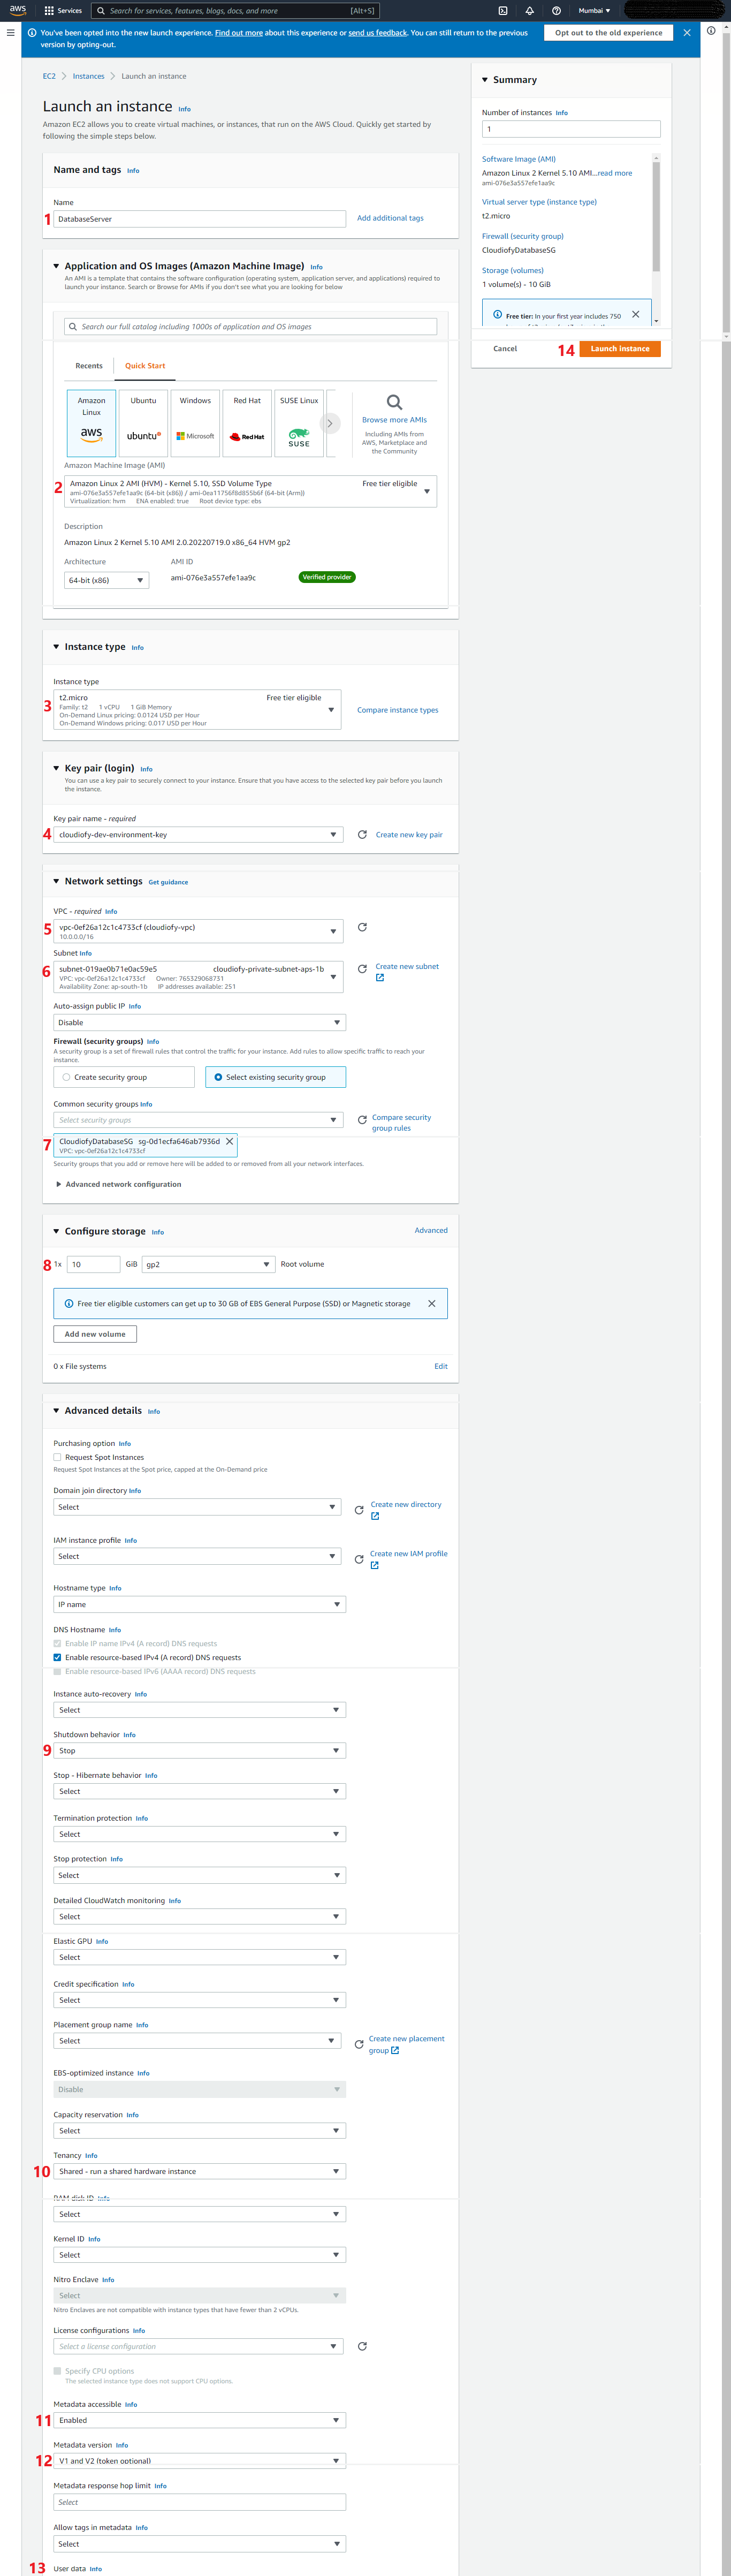
Note: The database server created on private subnet and it does not have a public IP4 address. So it can’t be accessible from internet.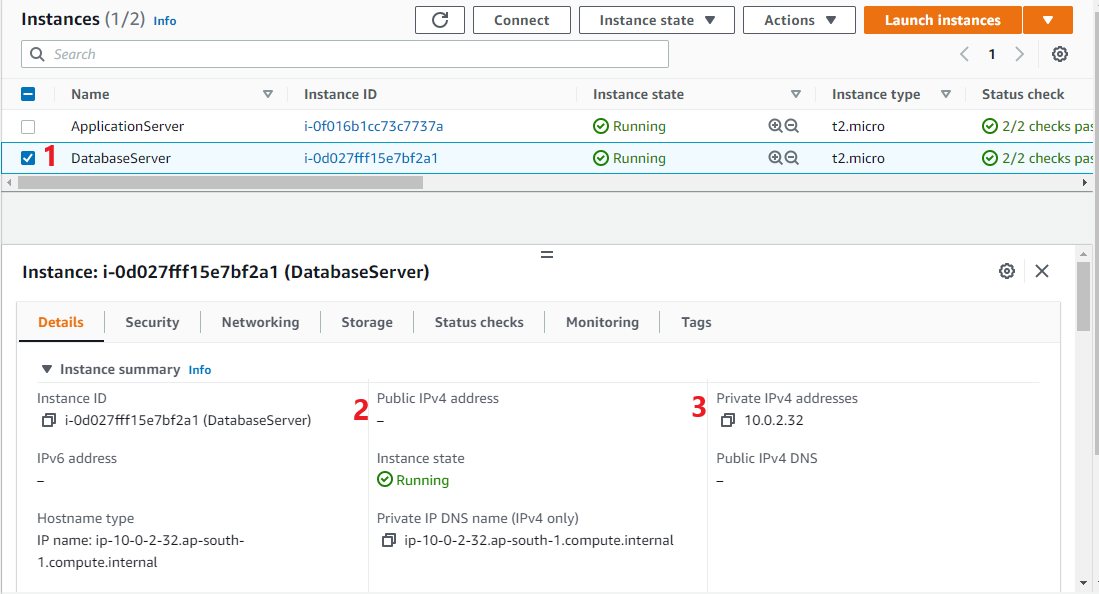
Ping private server (i.e. Database Server) from public server using putty. You could use step-2 of the article to know How to connect EC2 Linux instance from Windows using PuTTY.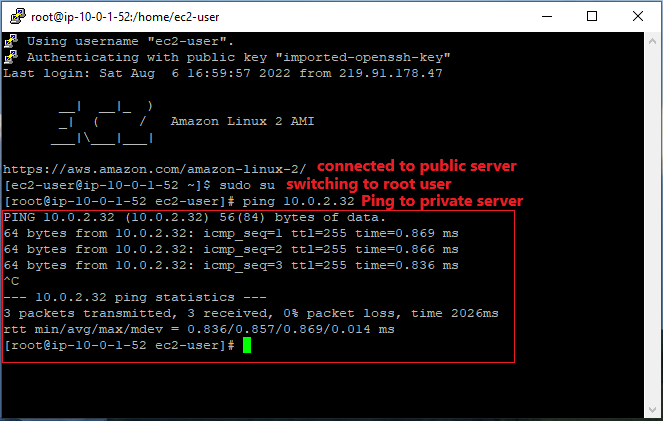
You can set up a network address translation (NAT) gateway to enable instances in a private subnet to connect to the internet or other AWS services.
Next part of VPC Lab
VPC Hands-On Lab -3 – How to connect to an ec2 instance in a private subnet
VPC Hands-On Lab -4 – How to control network traffic using Network ACL
How to Connect Public and private subnet in same VPC