A Complete Guide to create VPC in AWS
The objective of this tutorial is to create custom VPC and associated components step by step. This tutorial will help you to understand the AWS networking components and the relation between them. Before starting VPC lab, You could refer to the following articles for more understanding of Virtual Private Cloud (VPC):
Hands-On VPC Lab -1
1. VPC architecture diagram
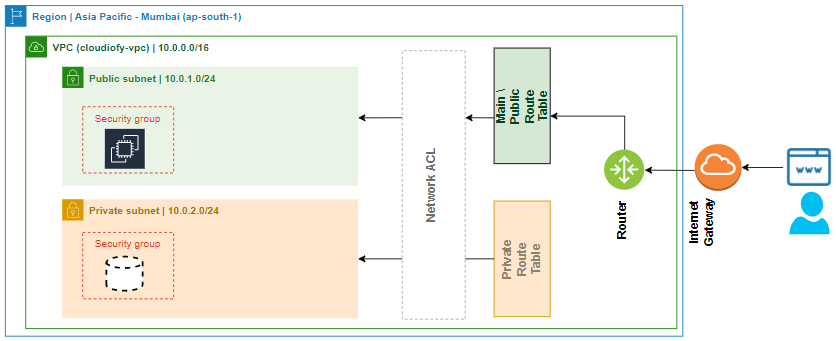
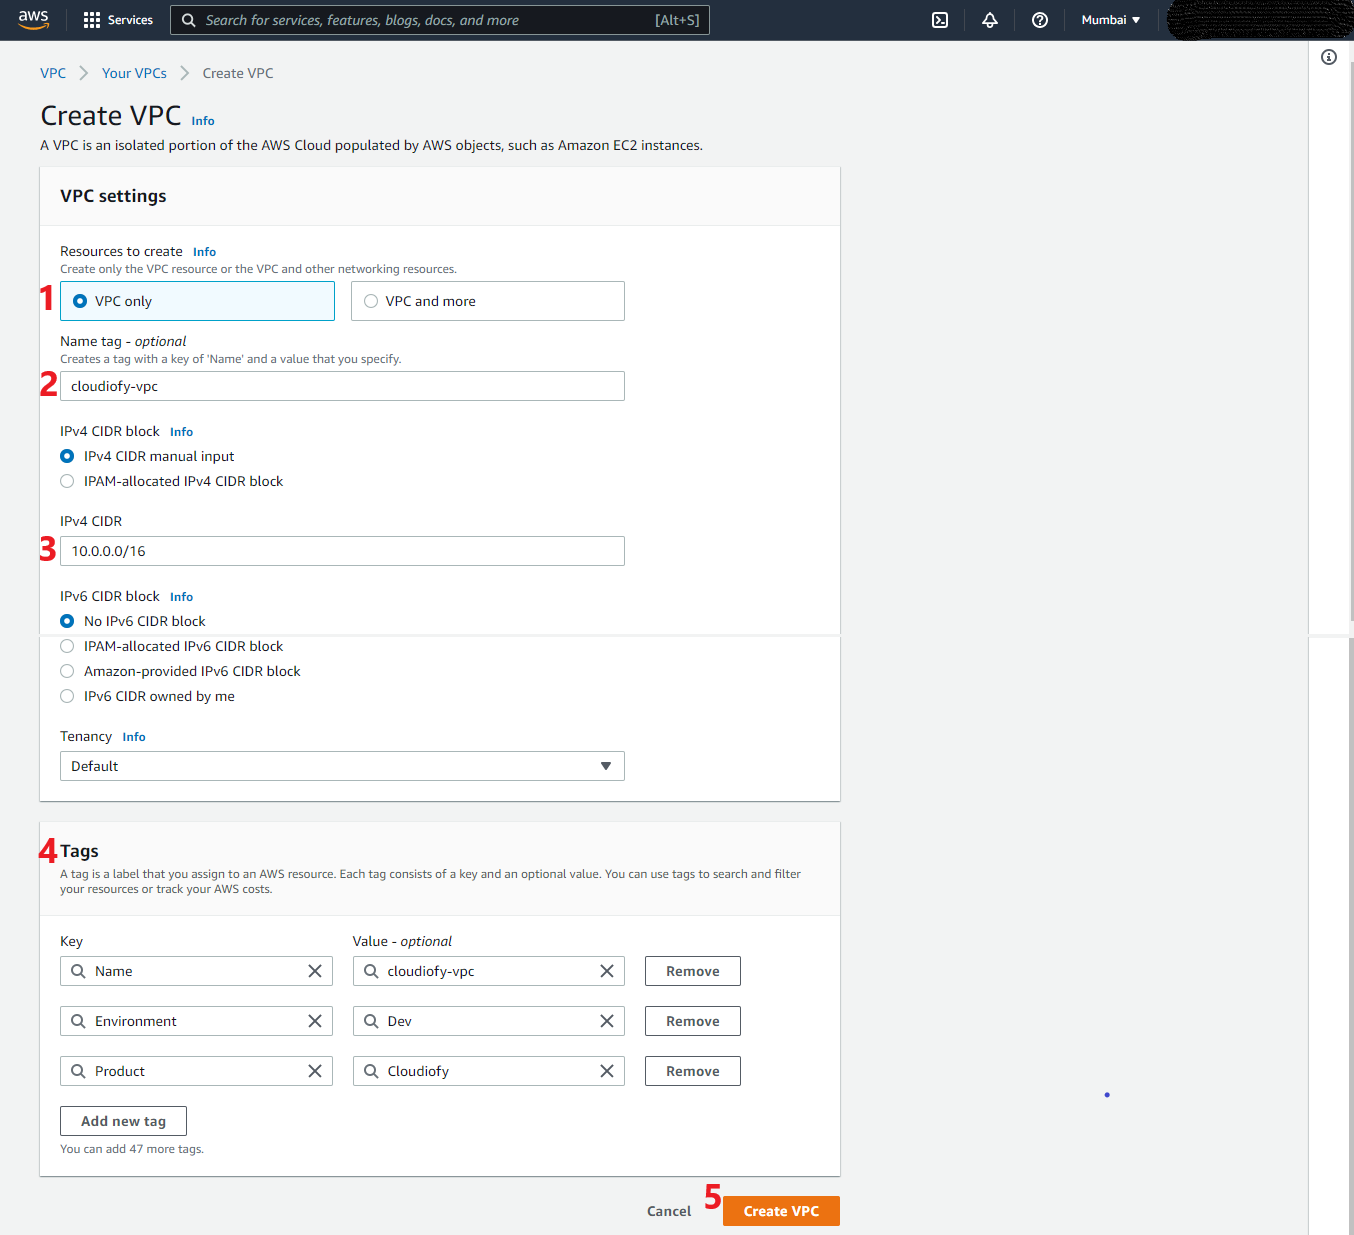
Create VPC with IP 10.0.0.0/16
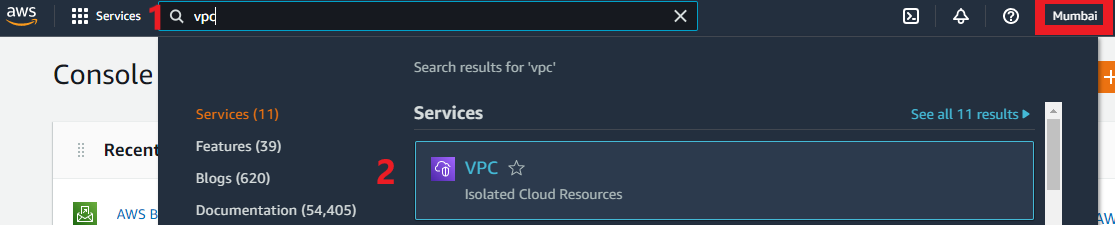
- Log in to AWS, Select your region (For example, Asia Pacific (Mumbai)), Search Service VPC, and go to VPC home page:
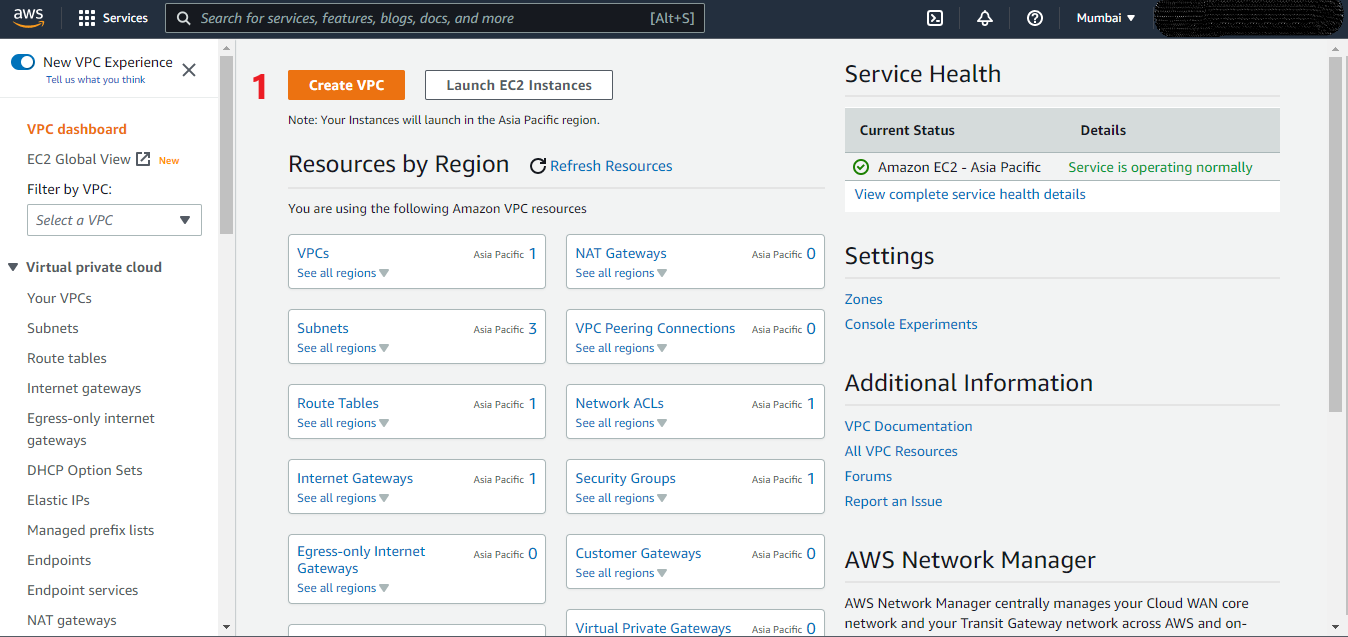
- VPC Home page. Choose, Create VPC
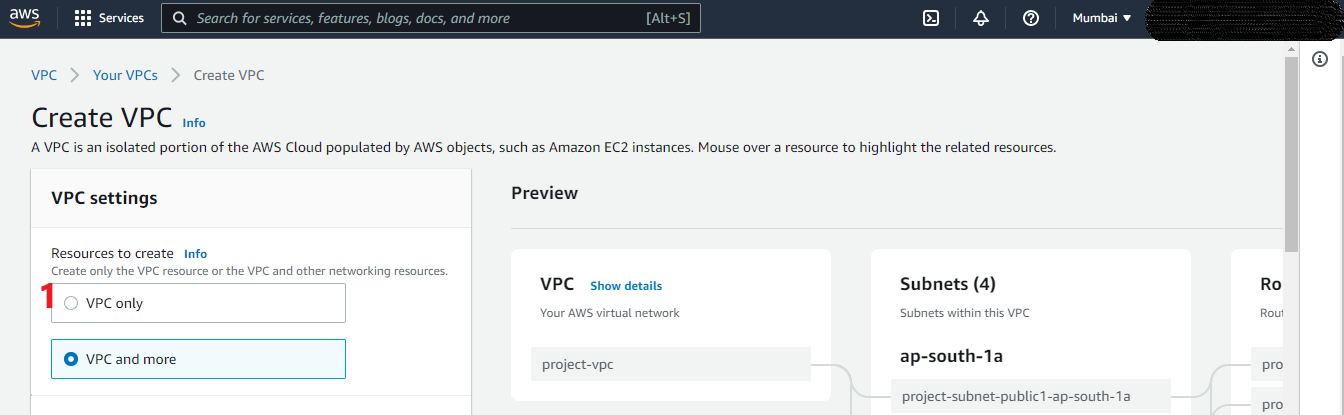
- Choose Option VPC only, to understand more about VPC and Its component
- Create VPC
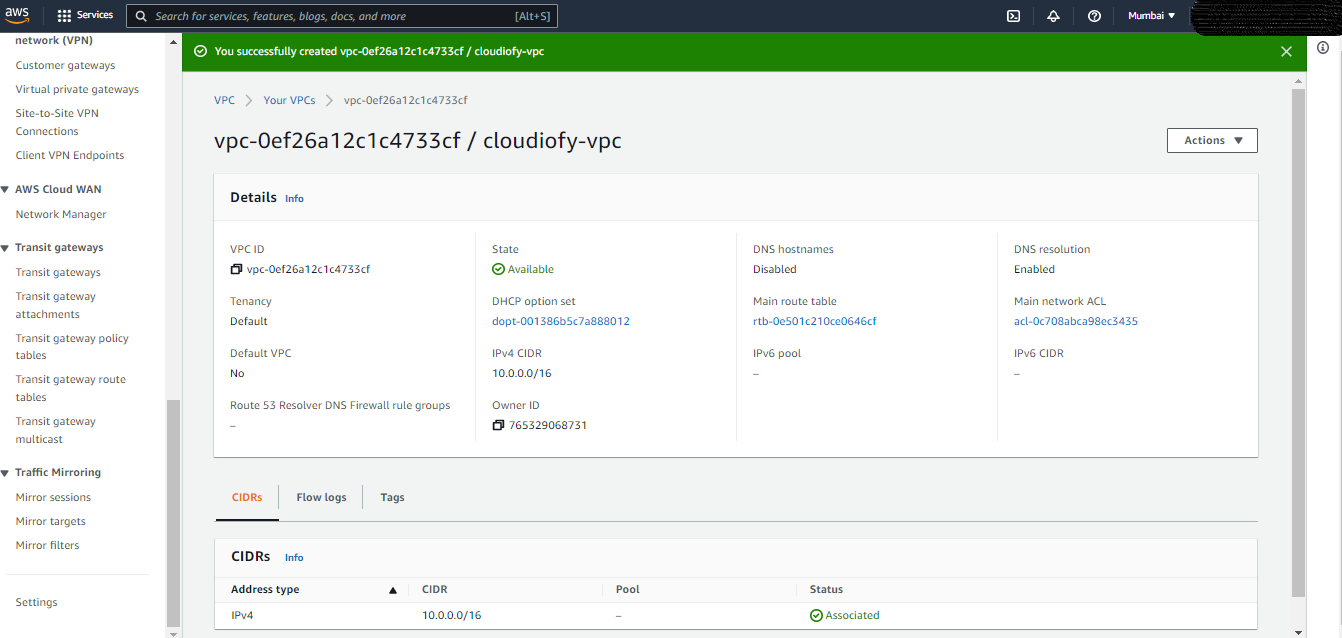
- VPC created successfully
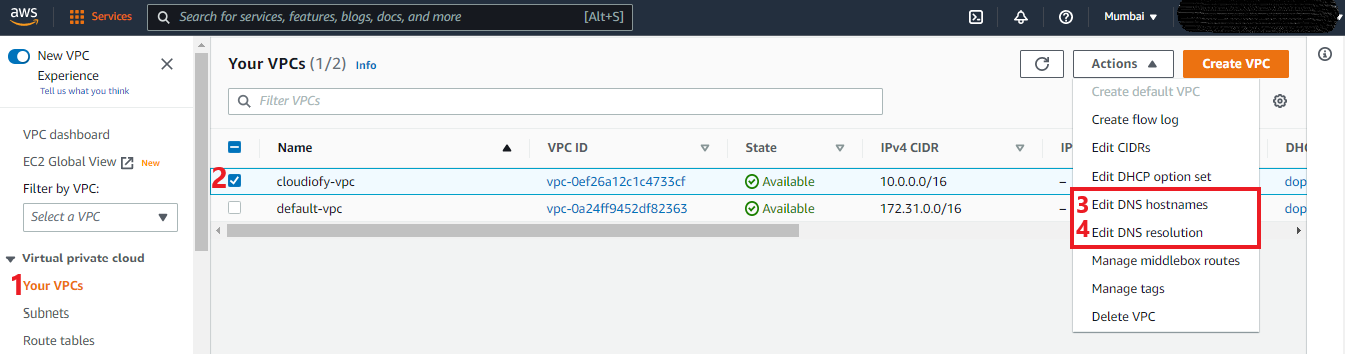
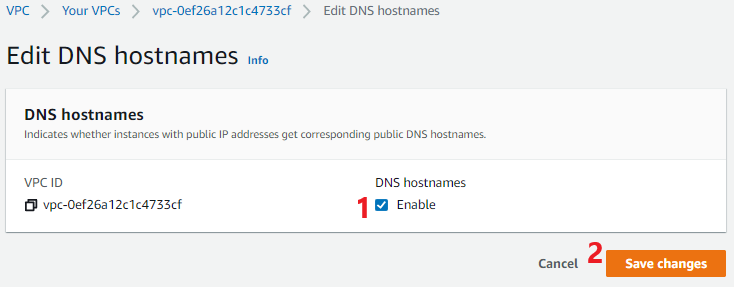
- Edit DNS hostnames and Edit DNS resolution

Note: After creation of VPC (i.e. cloudiofy-vpc) by default following component being created:
- A default security group
- A Main Route Table
- A default network ACL
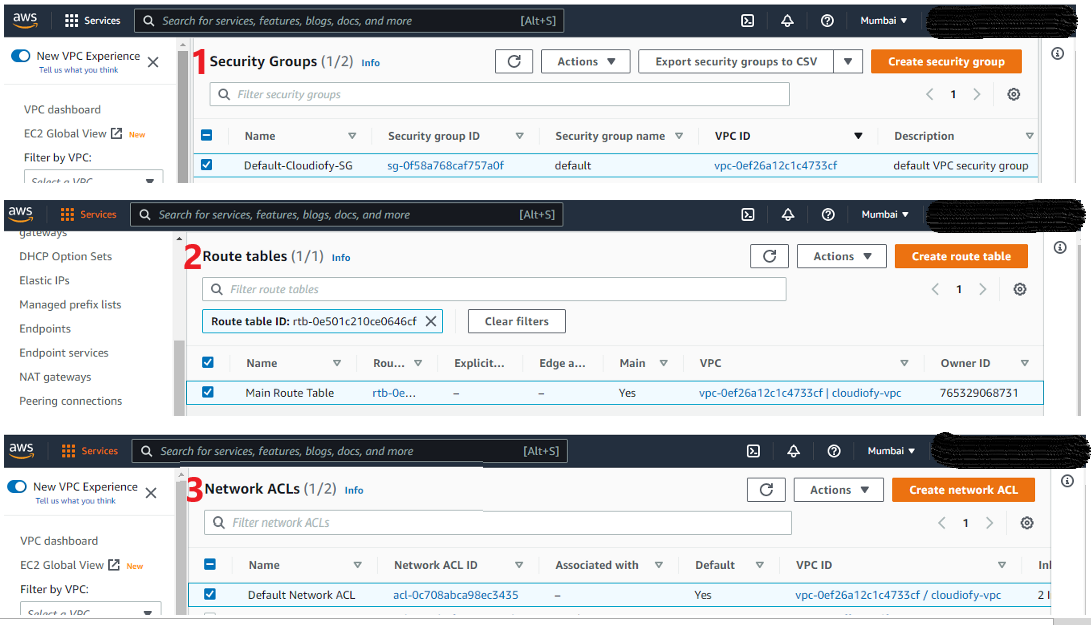 For the above VPC components, We will be creating a custom components in coming steps
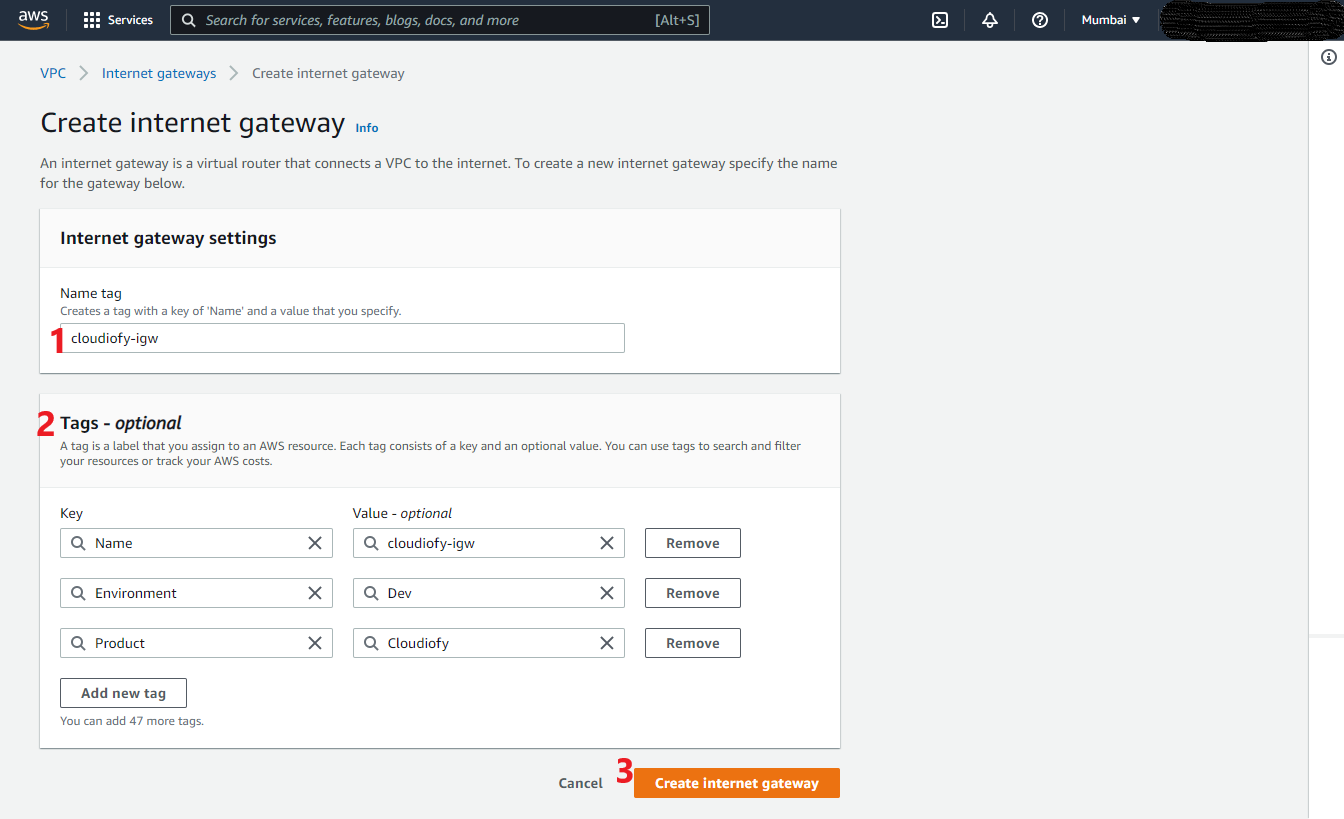
Create an Internet Gateway and attach to VPC
- Go to VPC home page, Choose Internet Gateway from left menu, and Click to Create Internet gateway

- Create an internet gateway
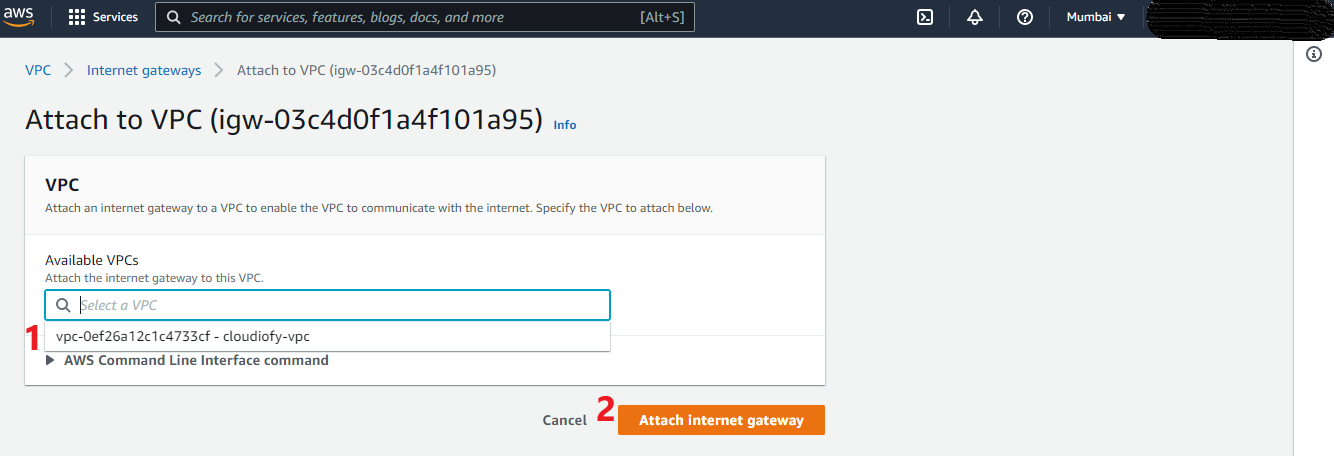
- Internet gateway created successfully, Now Attach it to VPC

- Choose your VPC and attach
Create public and private subnet in two different availability zone
You can add one or more subnets in each Availability Zone, Which is an AWS infrastructure deployment that places computing, storage, database, and other services closer to your end users.
Each subnet must reside entirely within one Availability Zone and cannot span zones.
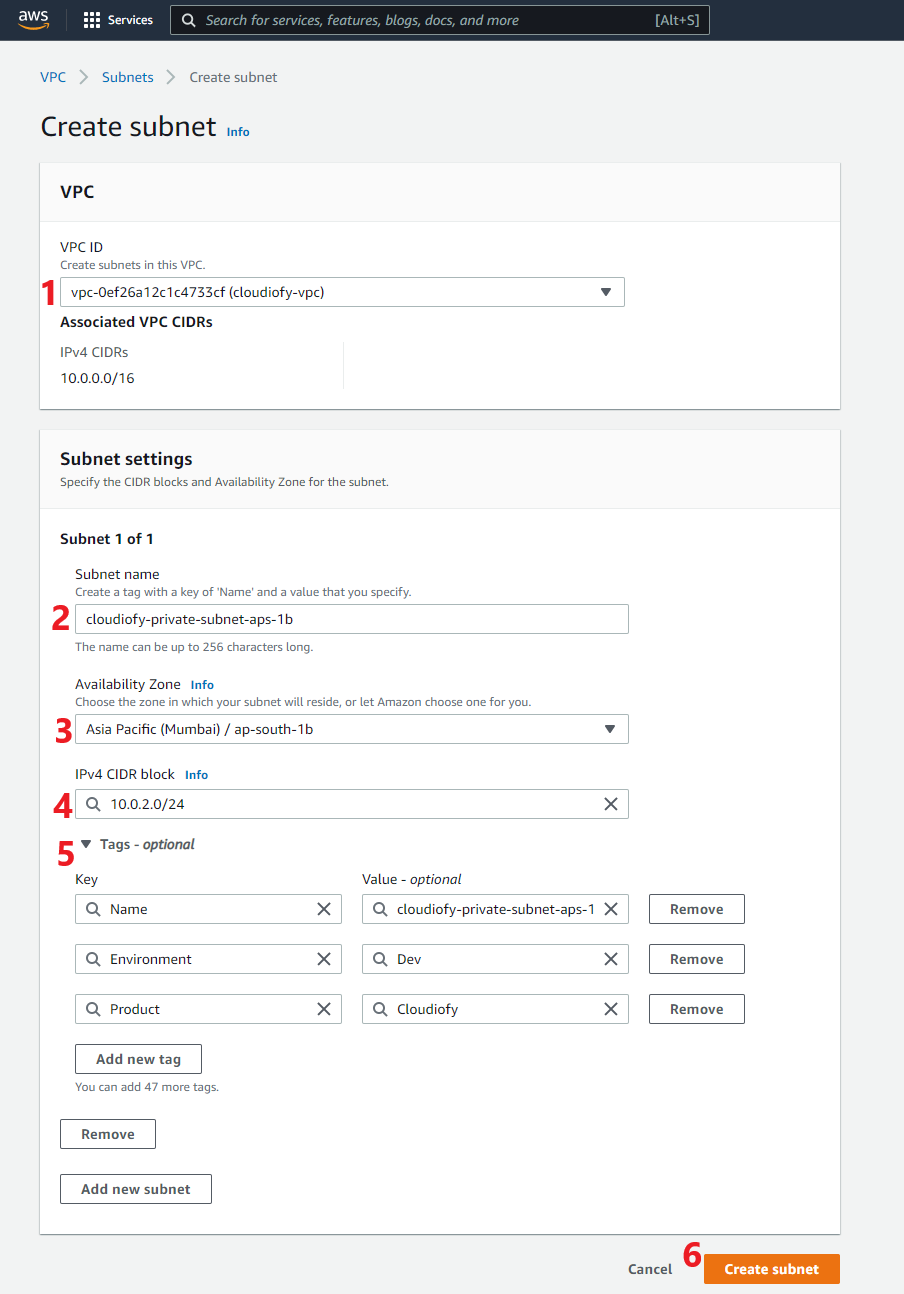
- Go to VPC home page, Choose Subnets from left menu, Click to Create subnet
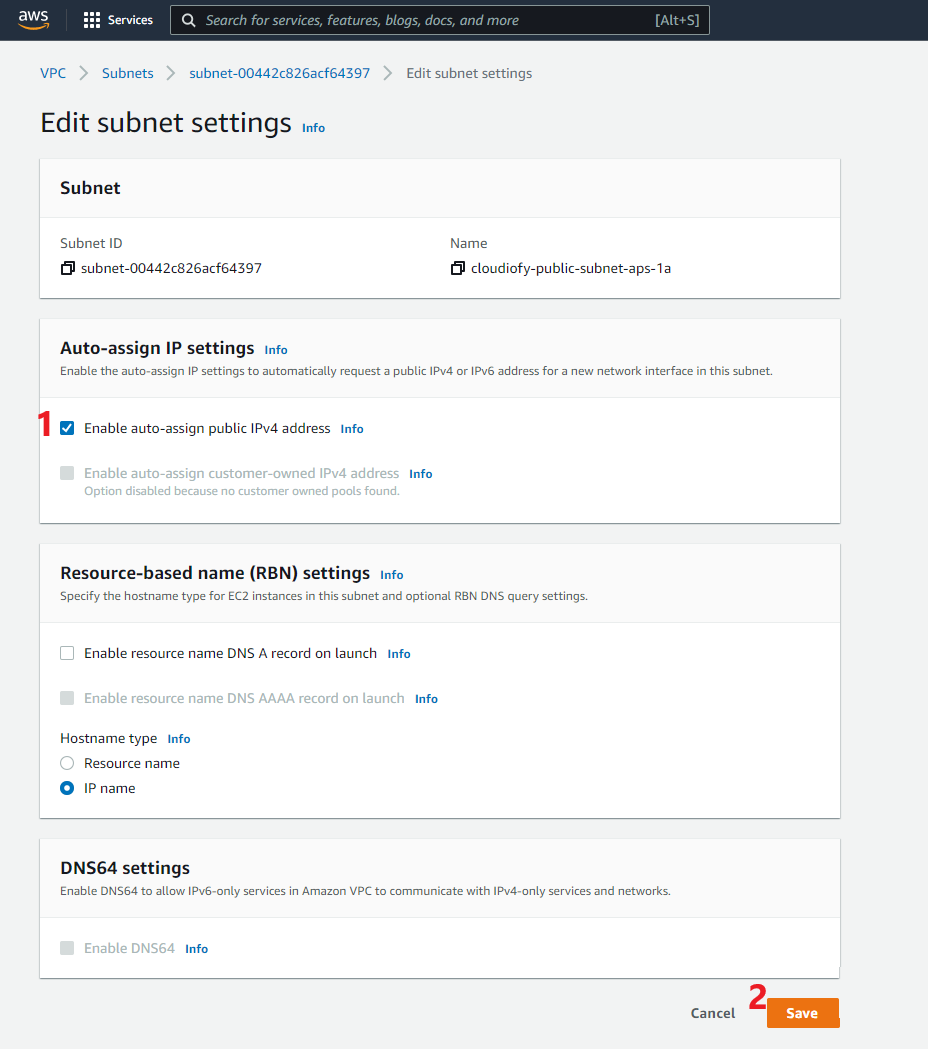
- Public Subnet with IP – 10.0.1.0/24 | Availability zone: ap-south-1a

- By default, “Auto assign public IPv4” is not enabled. To get Public IP assigned to resources, Select public Subnet (i.e. cloudiofy-public-subnet-aps-1a), Choose “Edit subnet settings” and “Enable auto-assign public IPv4 address”.

- Private Subnet with IP – 10.0.2.0/24 | Availability zone: ap-south-1b
 Both public and private subnets created successfully:
Configure Public (Main) route table and Private route table with correct subnet association
A route table contains a set of rules, called routes, that are used to determine where network traffic from your subnet or gateway is directed.
- Configure Public Route Table: – We can use the Main route table as a Public Route Table, To allow routing from/to internet, Edit Route, and Add an internet gateway


- Select Main-Public-Route-Table, Go to tab subnet association, and click to Edit subnet associations (associate public subnet)

- Configure Private Route Table:- Go to VPC home page, Choose Route Table from left menu, Click to Create a route table


- Associate private subnet, Select Private-Route-Table, Go to tab subnet association and click to Edit subnet associations (associate public subnet)

Next part of VPC Lab
VPC Hands-On Lab -2 : How to connect Public and private subnet in same VPC
VPC Hands-On Lab -3 : How to connect to an ec2 instance in a private subnet
VPC Hands-On Lab -4 : How to control network traffic using Network ACL