How to Create EC2 Linux Instance
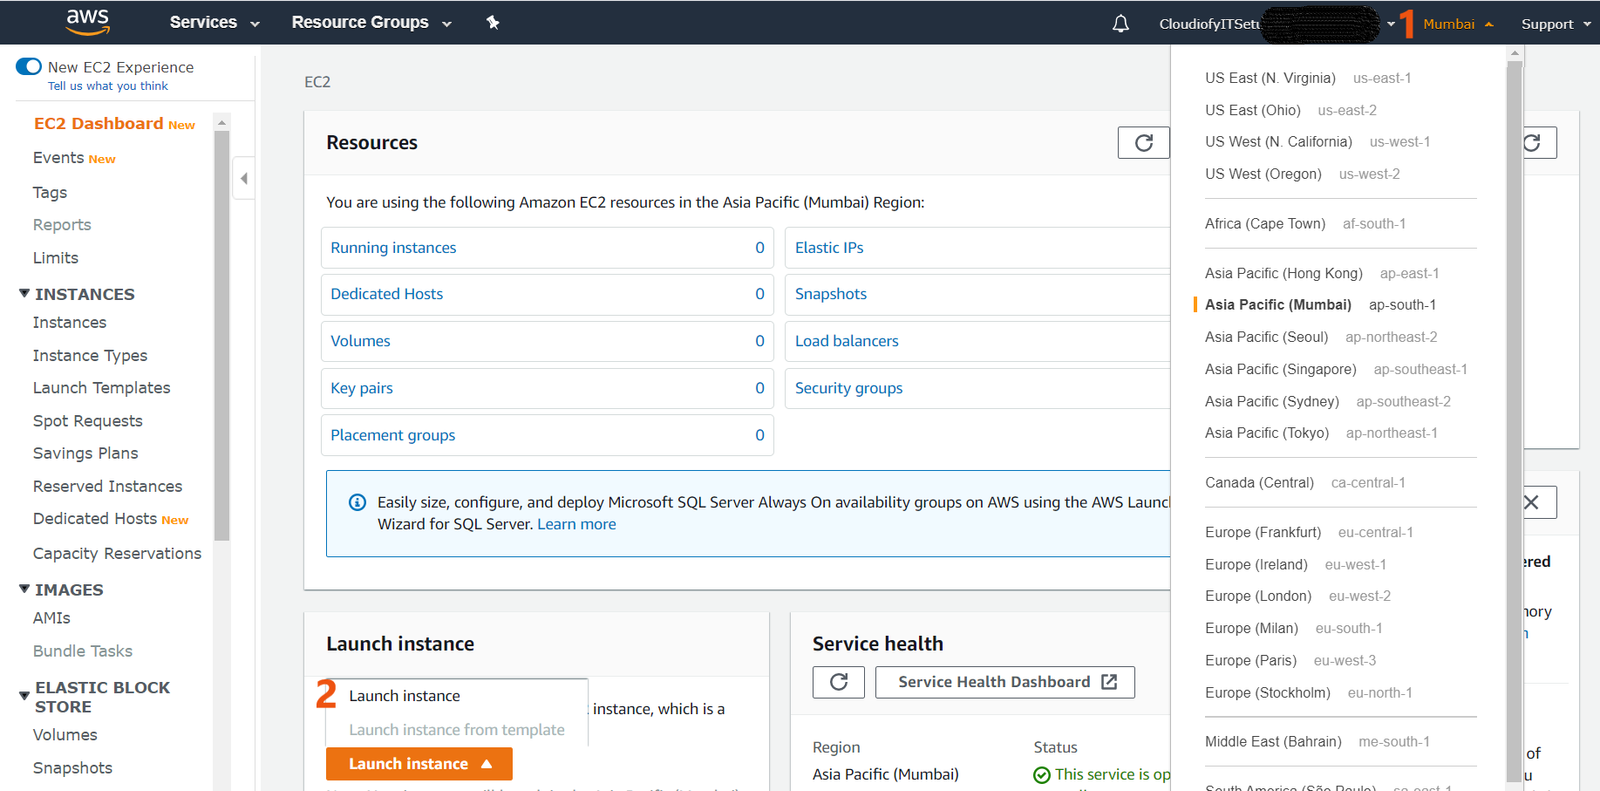
- Log in to AWS Console and go to EC2 Service
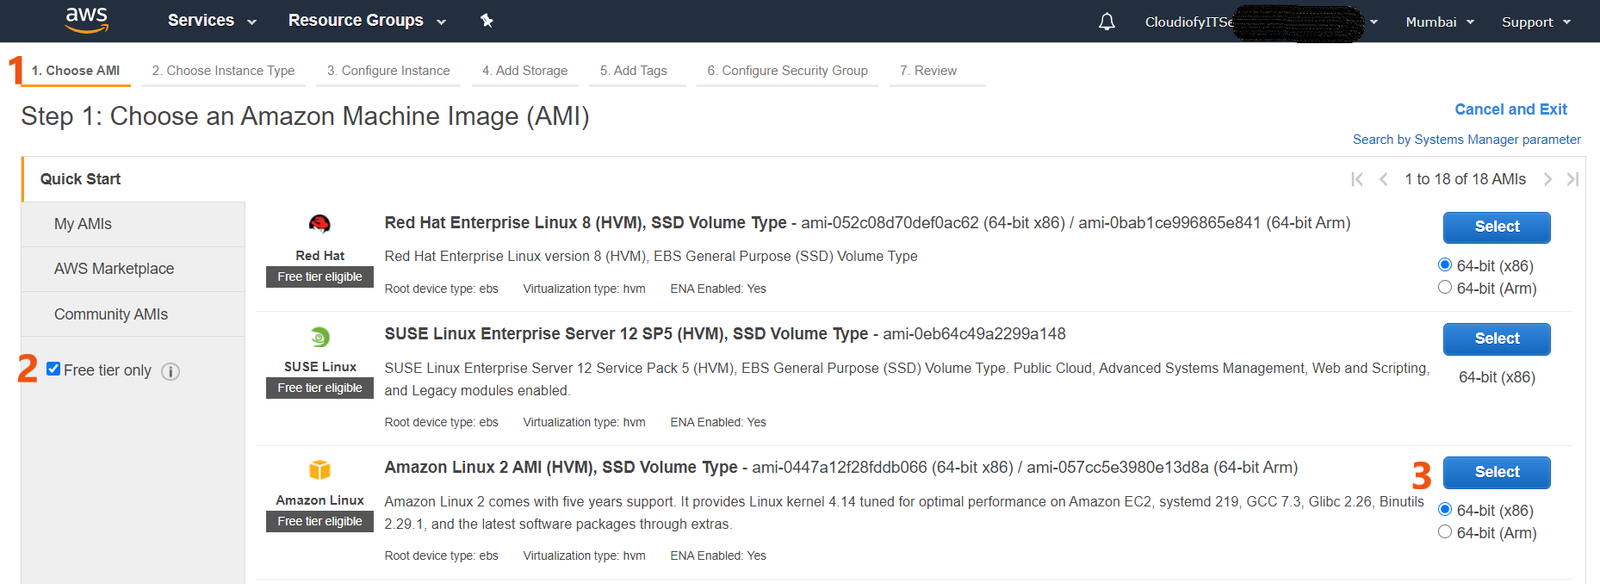
- Choose an Amazon Machine Image (AMI)
- Choose an Instance Type

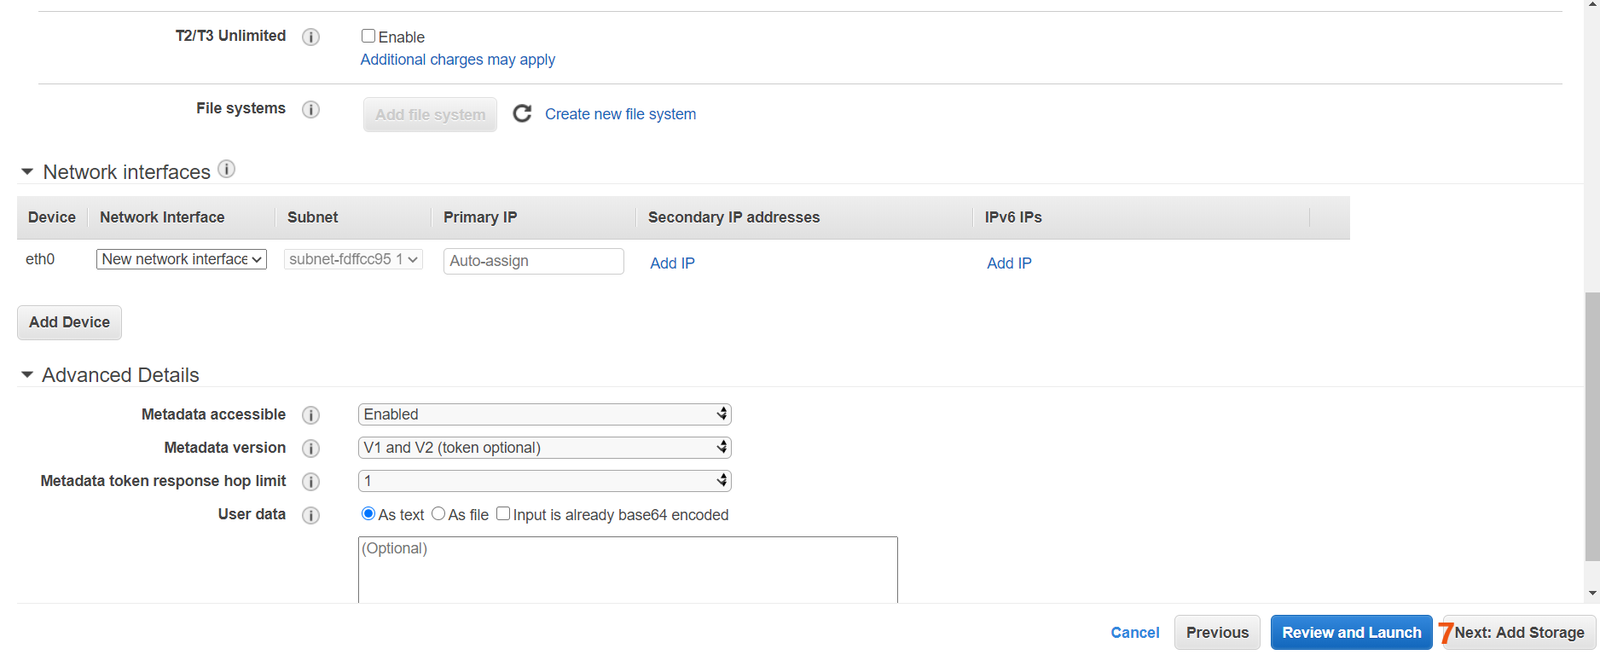
- Configure Instance Details

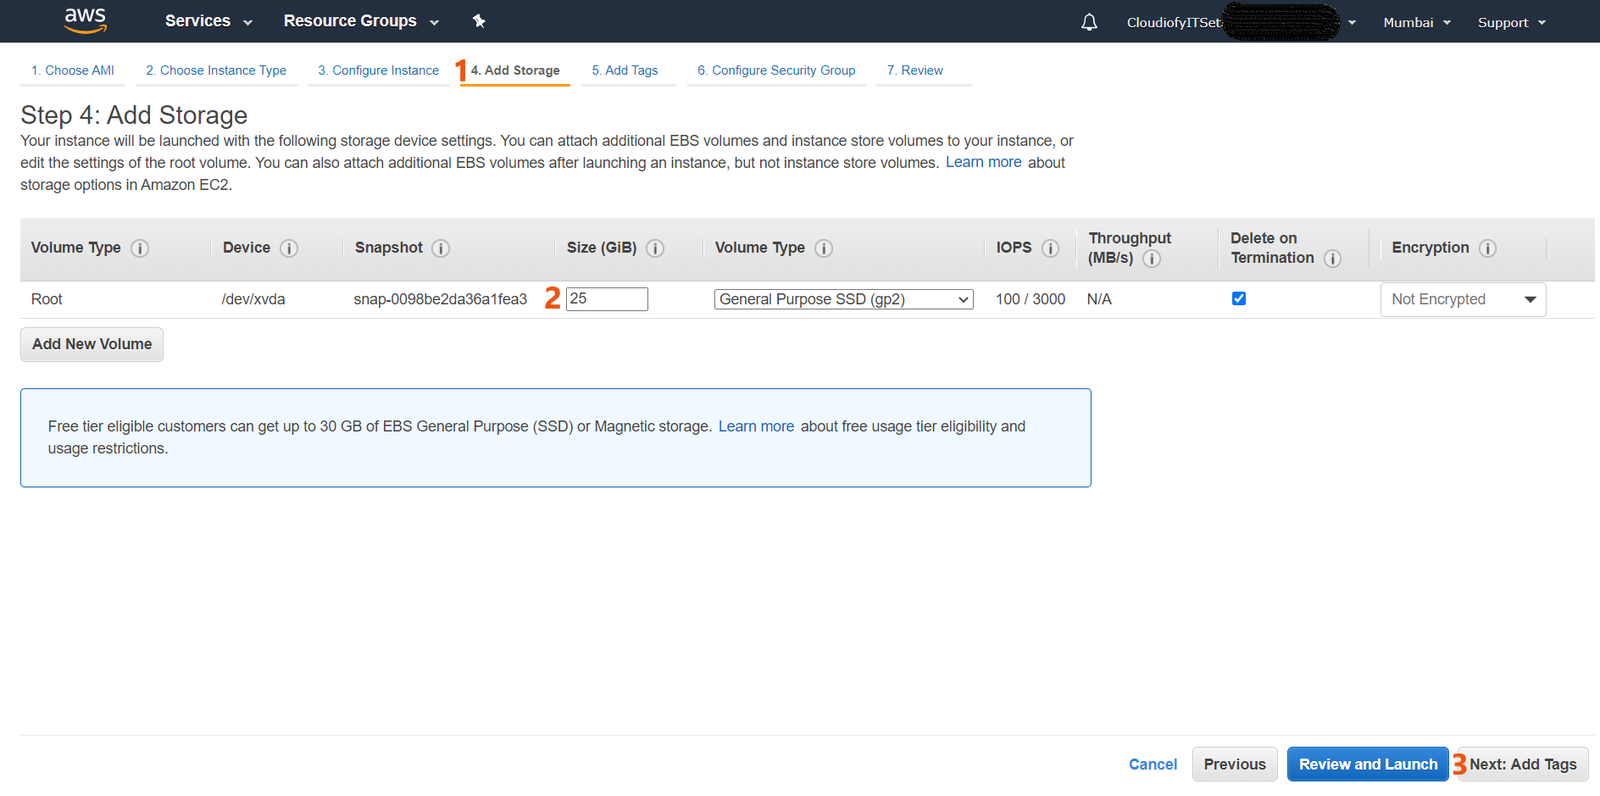
- Add Storage
- Add Tags

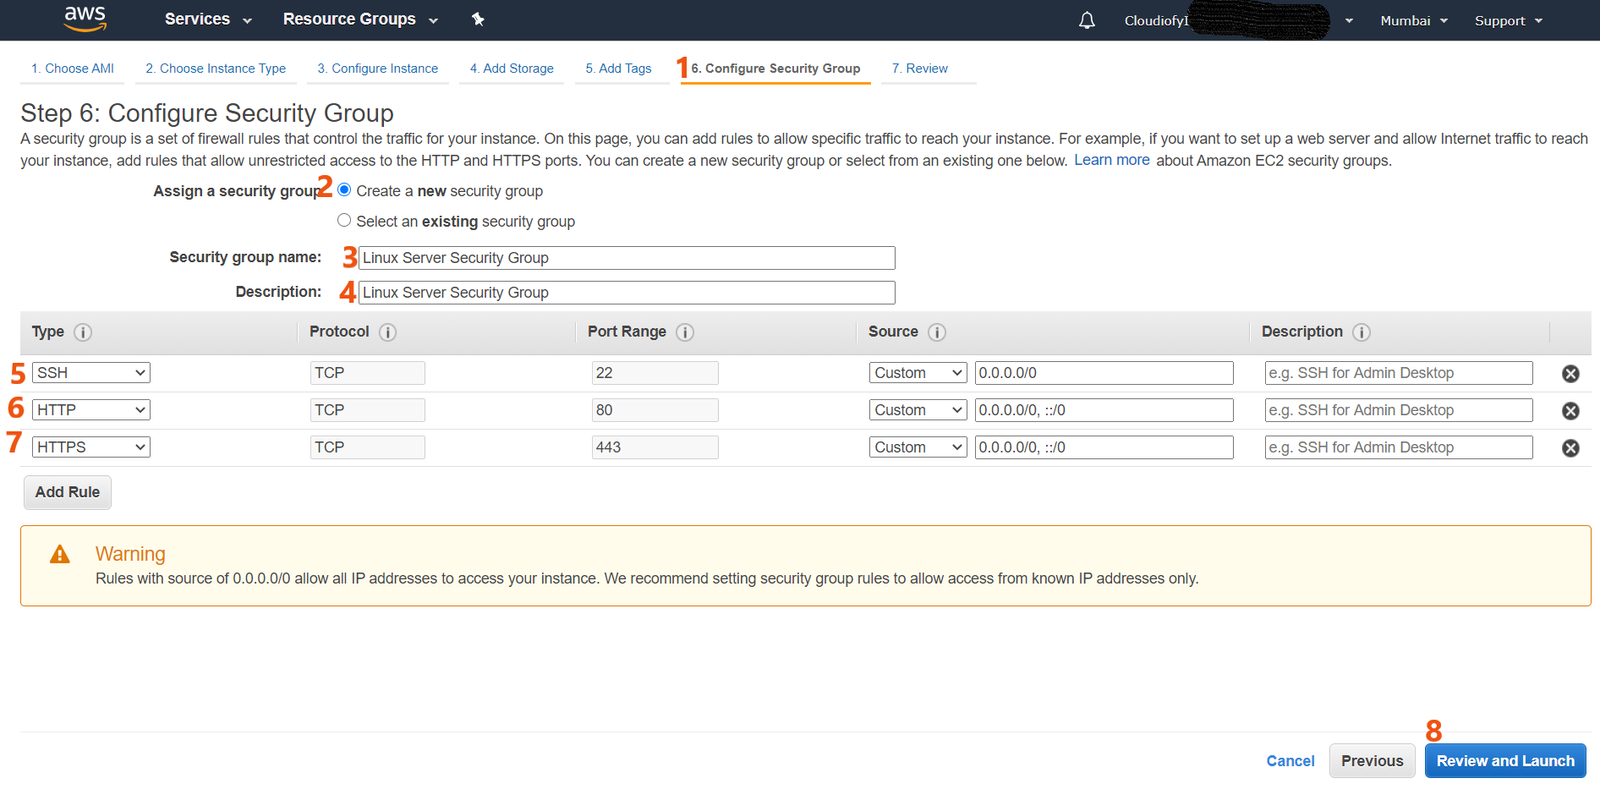
- Configure Security Group
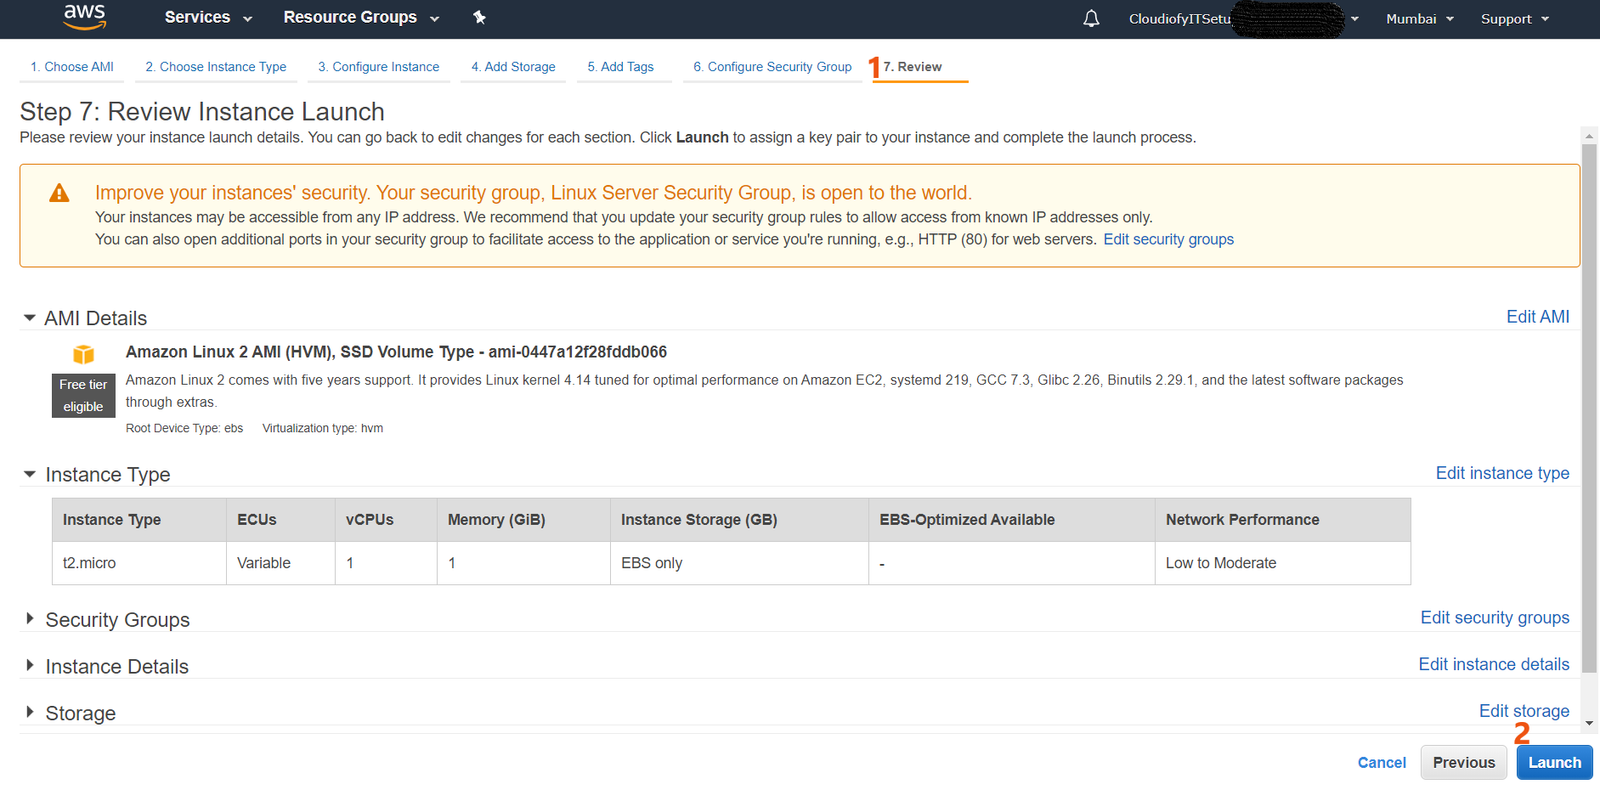
- Review Instance, Launch and Select or Create Key Pair

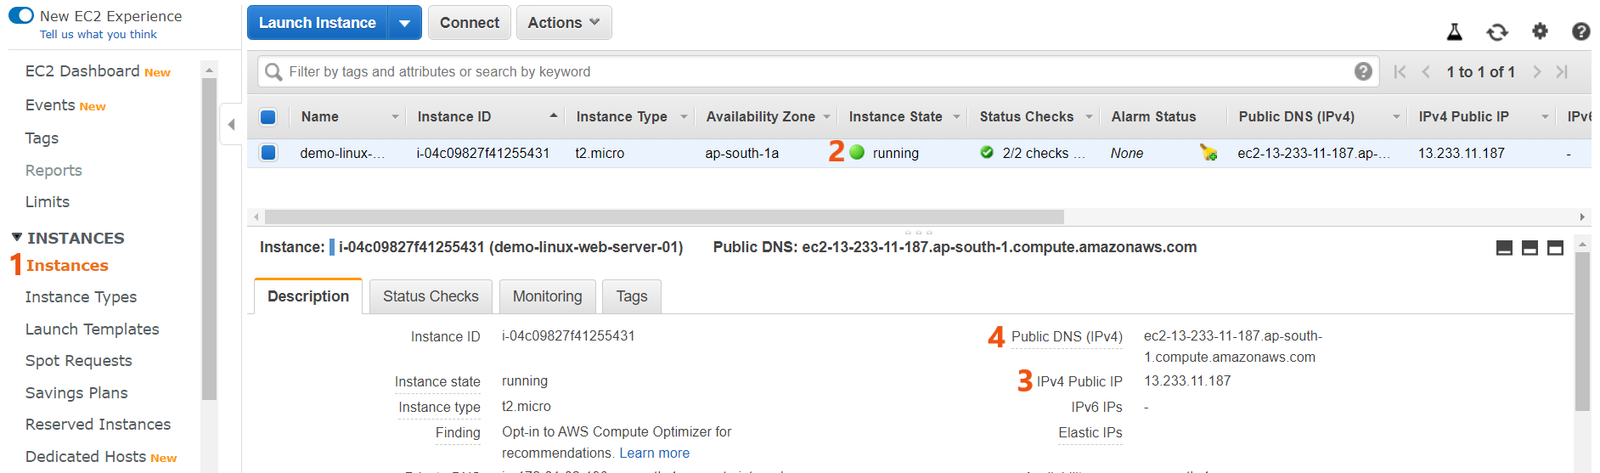
- Done! Verify created instance is ready
How to connect EC2 Linux instance from Windows using PuTTY
- Install PuTTY on your local computer
- Download and install PuTTY from the PuTTY download page
- Download the putty.exe and puttygen.exe file

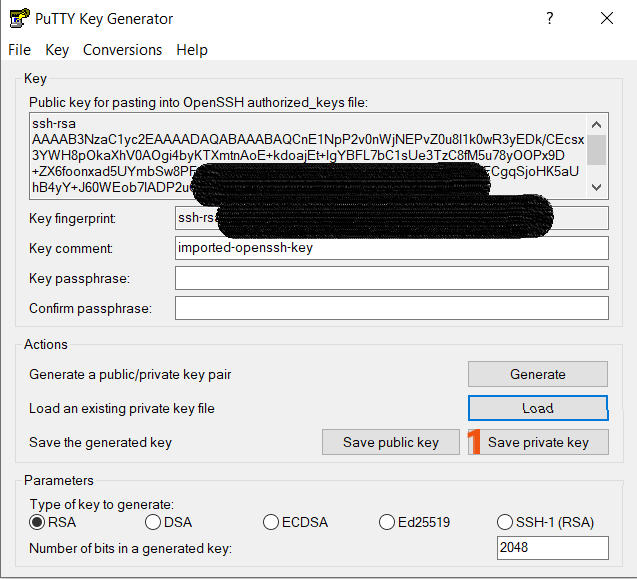
- Convert your private key using PuTTYgen
- Open puttygen.exe, select RSA, and click on Load

- Open puttygen.exe, select RSA, and click on Load
- By default, PuTTYgen displays only files with the extension .ppk. To locate your .pem file, select the option to display files of all types. Select your .pem file for the key pair that you specified when you launched your instance and click to Open. PuTTYgen displays a notice that the .pem file was successfully imported.

- To save the key in the format that PuTTY can use, click Save private key. PuTTYgen displays a warning about saving the key without a passphrase. Click on Yes.
- In the Category, expand Connection type, expand SSH, and then select Auth
- Click on Browse. Select the .ppk file that you generated for your key pair and Select Open
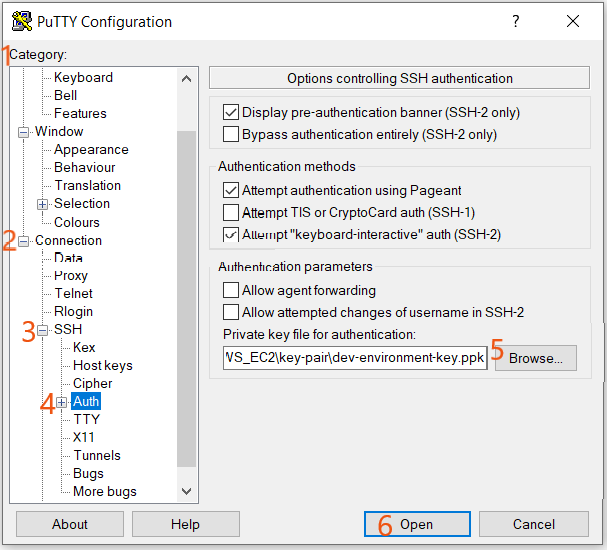
- Provide the name for the key that you used for the key pair (for example, dev-environment-key) and click on Save.
PuTTY automatically adds the .ppk file extension.
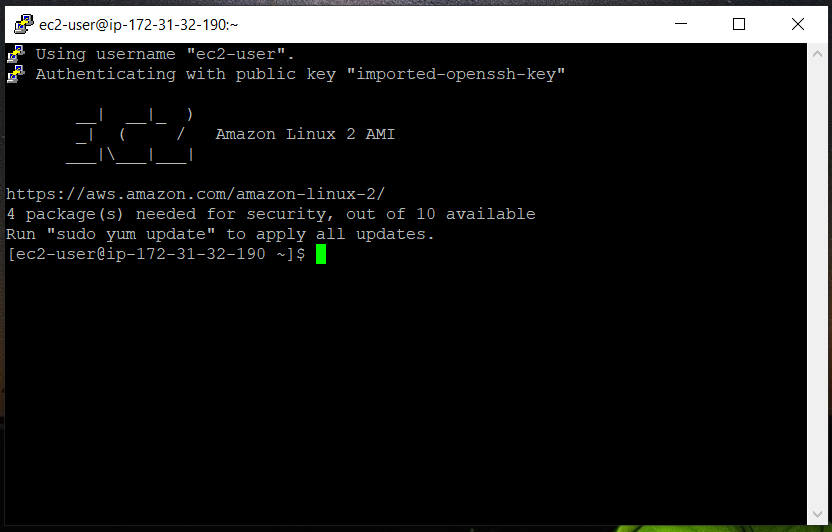
- For first time connection, PuTTY displays a security alert dialog box that asks whether you trust the host to which you are connecting, Click on Yes. A window opens and you are connected to your instance
How to use EC2 Linux instance as a web server
- Update EC2 instance (system update)
- Run Command for login as root user: sudo su
- Run command to apply all updates on an EC2 instance: sudo yum update -y

- Install Apache web server on the EC2 instance
- Run command to install Apache web server: sudo yum install httpd -y
- Run command to check installed version of Apache web server: sudo httpd -v

- Create a simple web page running on Apache Web Server
- Run command to go to the default root folder of the web server: cd /var/www/html
- Run command to show the contents of html folder: ls

- Run command for creating a file using nano editor: nano index.html

- A new file opens named as index.html, and write html code
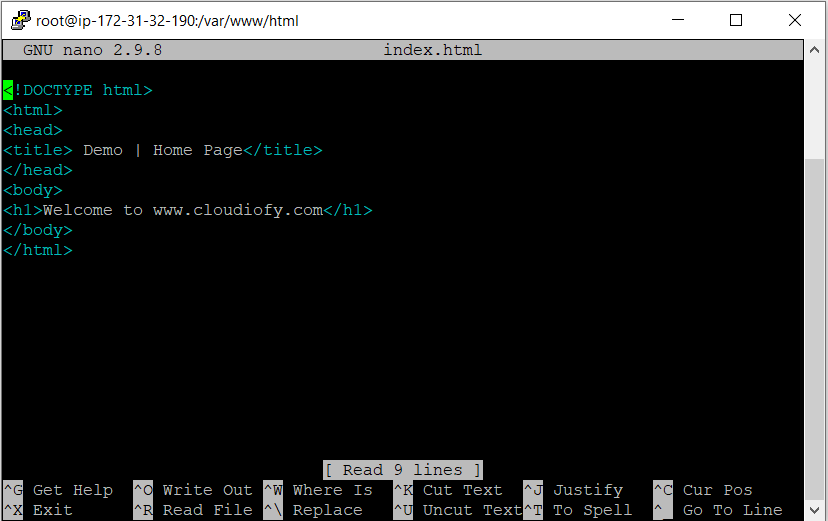
- When finished, Press Ctrl + X to close nano editor, Press Y to save your changes, and then press Enter.
- Run command for start Apache web server: service httpd start

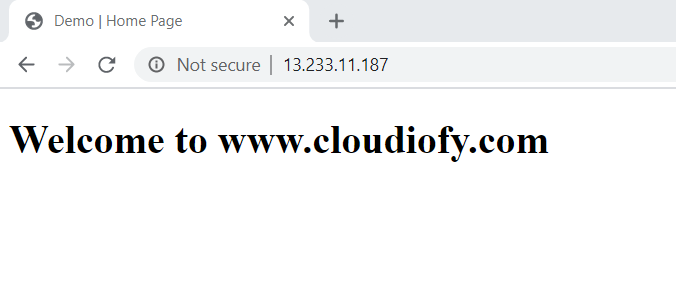
- Test created web page from the browser
- Copy Public-IP or Public DNS and paste on browser address – (Note: As SSL is not installed on the server, Use http protocol in the URL)
- Copy Public-IP or Public DNS and paste on browser address – (Note: As SSL is not installed on the server, Use http protocol in the URL)
Done! Now, Your web page is running on your EC2 instance.
Learn More – How to Create EC2 Windows Instance
How to Create EC2 Linux Instance