How to setup AWS Auto Scaling?
Objective
The objective of setting this AWS auto-scaling lab is to ensure that your application can handle network traffic by automatically adjusting the number of EC2 instances that are running. AWS AutoScaling allows scale resources up or down through a pre-defined threshold, which helps you only pay for the resources you actually need.
Prerequisites for this lab
- An AWS account.
- You need to have basic knowledge of AWS services like EC2 instances, VPC, and Security groups.
Steps by step guide for setup AWS Auto Scaling
- Login to your AWS Console and navigate to the EC2 service.
- Click on the “Auto Scaling Groups” option from the left-hand menu.
- Click on the “Create Auto Scaling Group” button to start the auto-scaling group creation process.

- Give an auto scaling group name and click on the “Create a launch template”).

- Give a name and description for launch template.

- Configure AMI for your application (Webserver).

- Configure instance type asper your need.

- Configure Key pair, Security group and Network settings.

- Configure EBS storage volumes and click on the “Create launch template”.

A launch template will be created.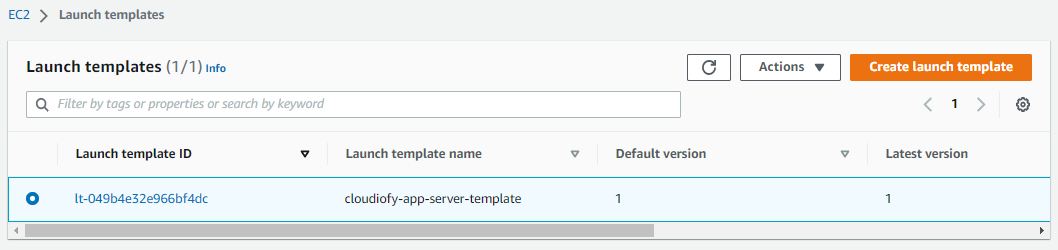
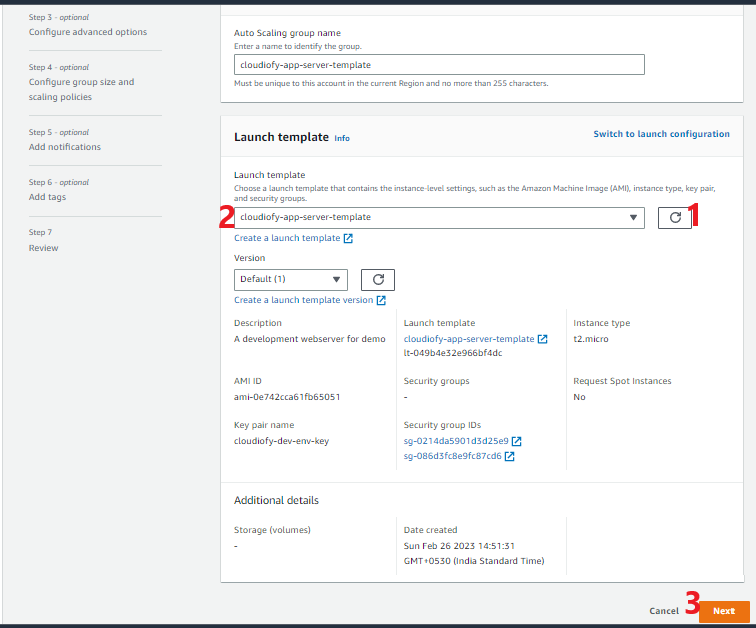
- Now, Go back to the screen “Create Auto scaling group”. Click on the refresh icon to get created launch configuration and select that launch template. After configuration click on the “Next”
- Choose the Network and subnet(s) configuration where you want to launch the EC2 instances.
You can select multiple subnets to ensure high availability. After configuration click on the “Next”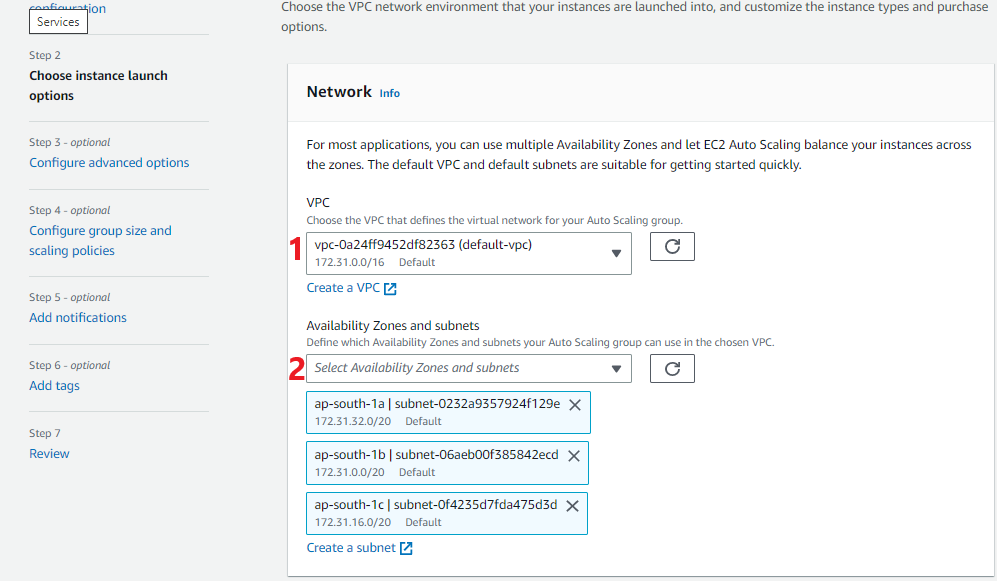
- Optional step: Create or attach a Load balancer or target group to distribute traffic across instances.
You can check here – How to setup AWS application load balancer.
Additionally, you can define the health check type and the grace period (for example 60 second) for EC2 instances to initialize before being marked as healthy or unhealthy. After configuration click on the “Next”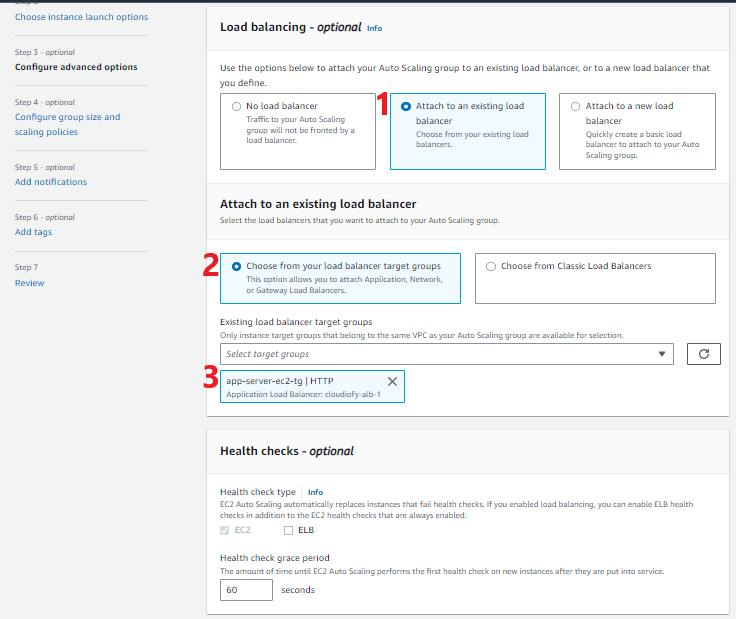
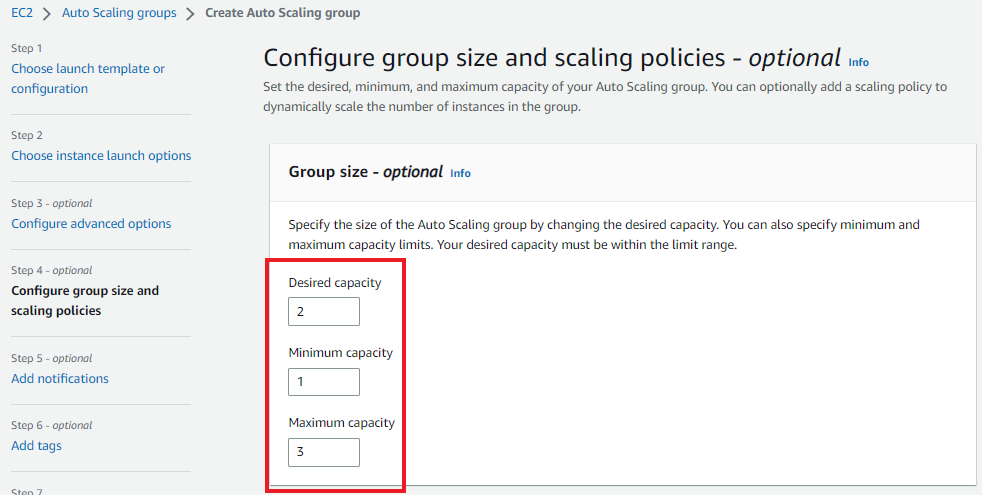
- Setup the minimum, maximum, and desired number of EC2 instances that should be running at any time.
- You can define scaling policies if required. Target tracking scaling adjusts the number of instances based on a predefined metric, while step scaling adds or removes instances based on thresholds that you define.
For example, Here for metric type “Average CPU utilization” the target value is 50 defined. After configuration click on the “Next”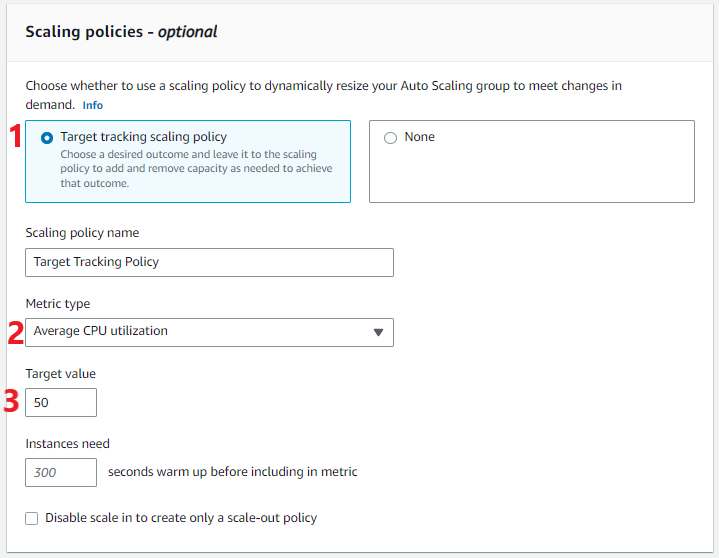
- Optional step: Add notification, Add Tags (skipping for this lab). Click on the “Next”
- Review your all configuration and click on the “Create Auto Scaling group” button
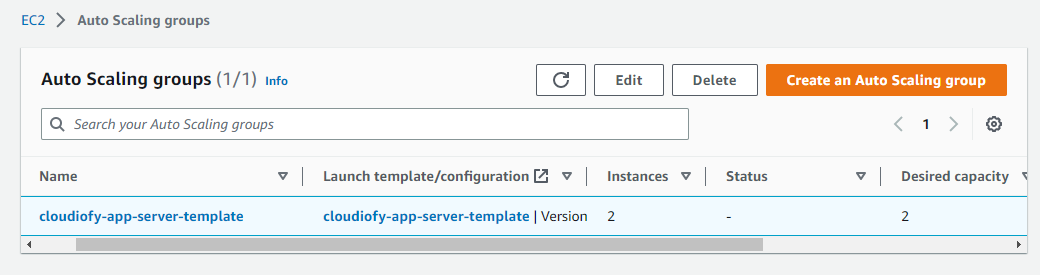
- After you have created your auto-scaling group, AWS will automatically launch desired EC2 instances based on your defined scaling policies. You need to wait for some time and refresh your EC2 instance dashboard.

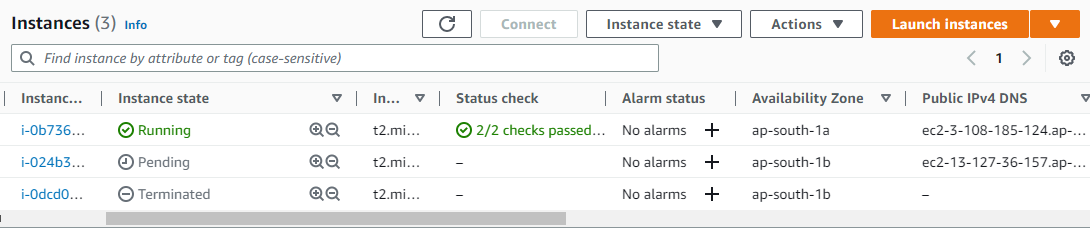
- To validate the AutoScaling configuration, let’s terminate one instance after sometime (using health check configuration), AutoScaling will automatically create a new instance to meet your configured desired capacity of instances.
Note: Make sure to delete all the AWS resources created for this lab to avoid unnecessary charges.
How to Setup AWS Auto Scaling