How to setup AWS application load balancer?
Objective
The objective of this AWS Application Load Balancer lab is to learn how to create and configure an AWS Application Load Balancer to distribute incoming traffic across multiple EC2 instances in different availability zones.
Prerequisites for this lab
- An AWS account.
- You need to have basic knowledge of AWS services like EC2 instances, VPC, and Security groups.
- Setup 2 EC2 instances in different availability zones. For example, here two EC2s are configured, one in availability zones (ap-south-1a) and another one in availability zones (ap-south-1b).

- A target group to register the EC2 instances with.
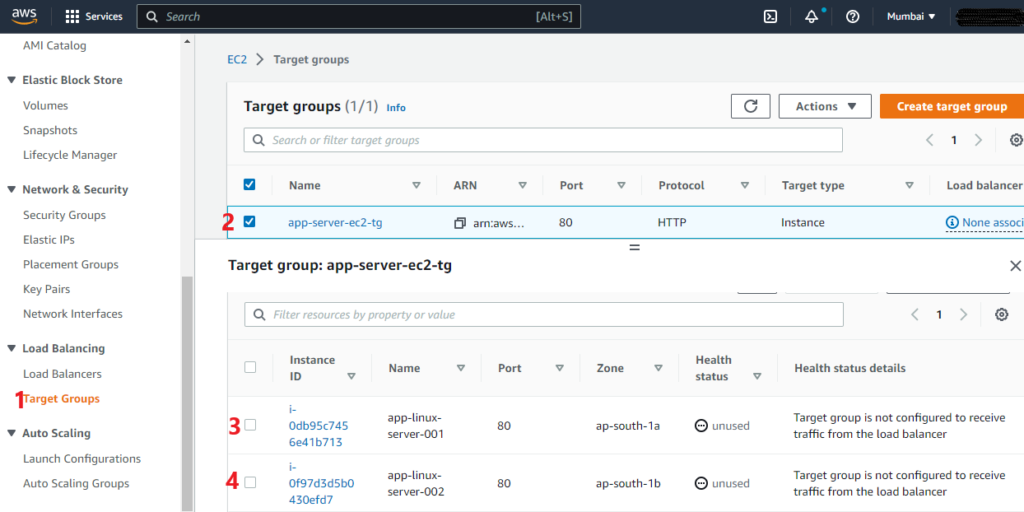
Steps by step guide for creating AWS application load balancer
- Log in to your AWS Management Console
- Search “Service” and select “EC2”
- In the EC2 dashboard, click on the “Load Balancers” option under the “LOAD BALANCING” section
- Click on the “Create Load Balancer” button

- Select the “Application Load Balancer” option and click on the “Create” button
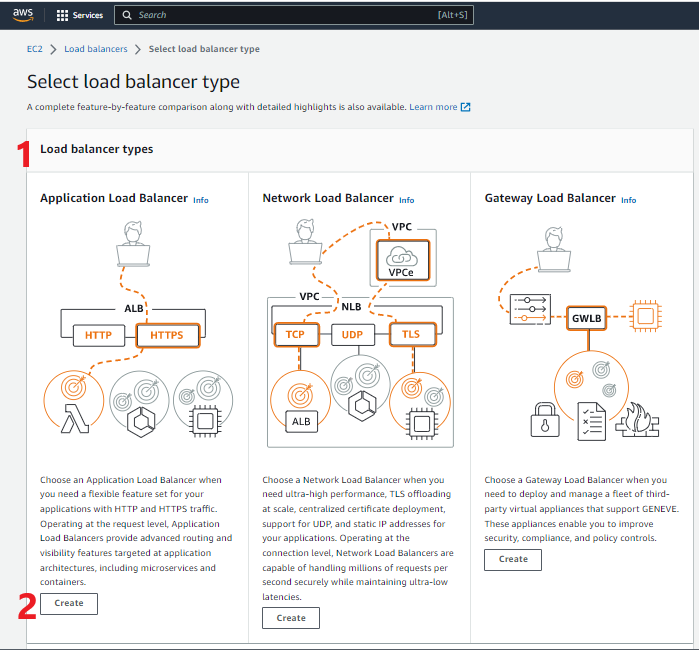
- In the “Configure Load Balancer” page, configure the following settings:
Basic Configuration: Give a name, Scheme ( “Internet-facing” or “Internal” option depending on your requirements), and IP address type.
- Network Mapping: Choose the VPC, and Select the availability zones where you want to distribute traffic.
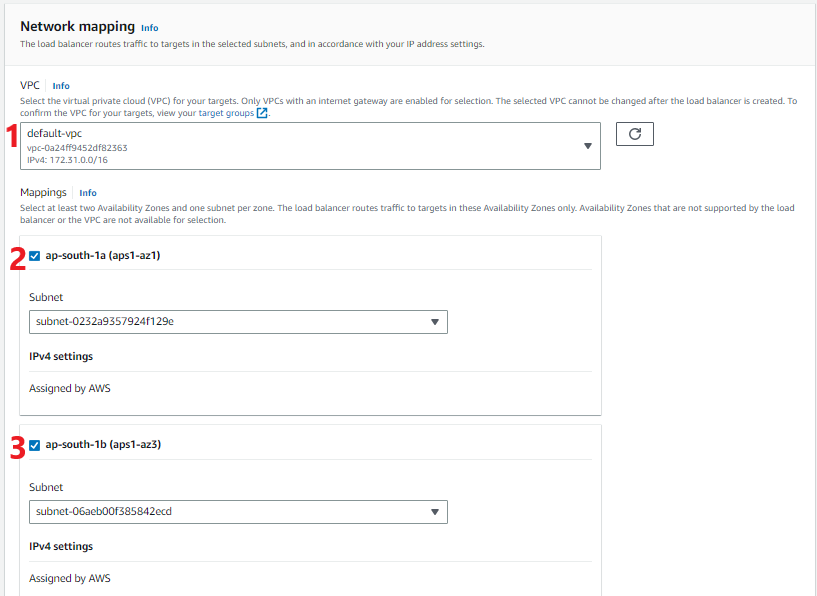
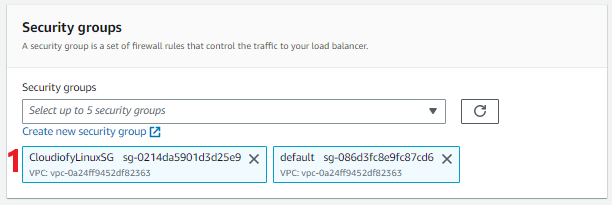
- Security Groups: Create and configure a security group for the load balancer and allow inbound traffic for HTTP or HTTPS protocol
- Listener and routing: Configure Listeners and target group, and listener rules.

- Check your configuration summary, and Click “Create load balancer”
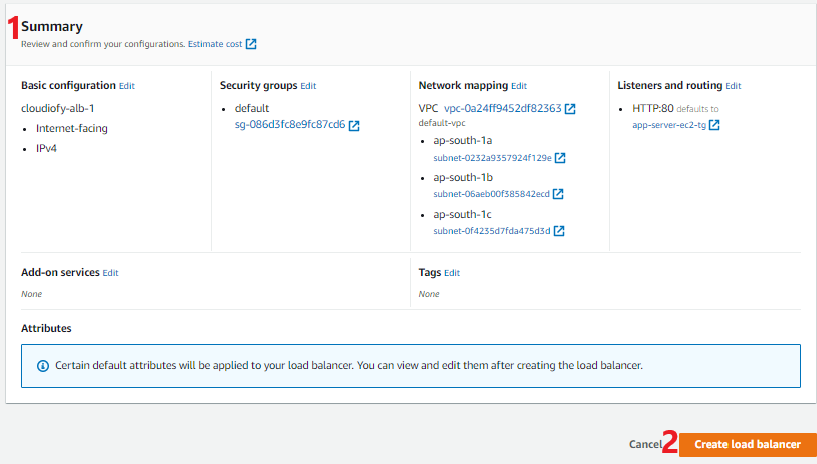
- Load balancer created! Now, You can test the load balancer by accessing the DNS name in a web browser or using a load testing tool.


Note: Make sure to terminate the EC2 instances and delete the resources once the lab is completed to avoid unnecessary charges.
How to setup AWS application load balancer
