AWS S3 Website Hosting : The Ultimate Guide for Hosting Static Website
Introduction
Are you looking for an efficient way to host your static website? Look no further than AWS S3 hosting! Amazon S3 (Simple Storage Service) is an object storage service that allows you to store and retrieve data from anywhere on the web. In this AWS S3 website hosting tutorial, we’ll guide you through the process of hosting your static website on AWS S3 with ease.
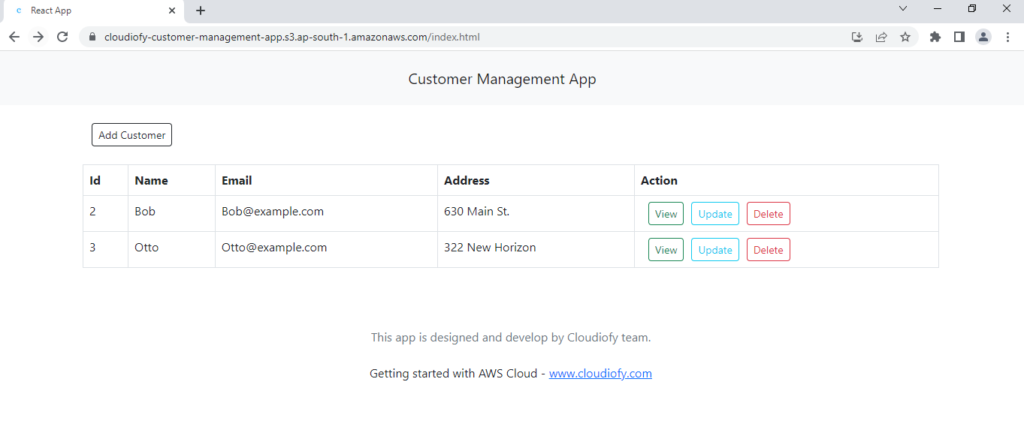
Preview of deploy single page application to AWS S3:
Prerequisites
- An AWS account and basic knowledge of AWS S3.
- A simple static website for hosting.
Why you should choose AWS S3 for your website hosting?
AWS S3 hosting is an excellent option for hosting your static website due to its numerous benefits. Here are a few reasons why S3 hosting is a great choice:
- Cost-effective: AWS S3 offers a pay-per-use pricing model, which means you only pay for the storage and bandwidth you use.
- Scalability: AWS S3 is highly scalable and can handle a large amount of traffic without any hassle.
- Security: AWS S3 provides multiple security features, including data encryption and access control, to keep your data safe and secure.
- Reliability: AWS S3 has a robust infrastructure and is designed to provide high availability and durability.
Now, you understand the benefits of using S3 hosting, let’s move into the step-by-step guide for AWS S3 static website hosting.
Step-1 : Create a static website
Create and design your own static website for hosting in AWS S3, here we have already designed a static website Customer Management App using HTML, CSS and React JavaScript library for demo purpose.
Step-2 : Create, configure and host website in AWS S3 bucket
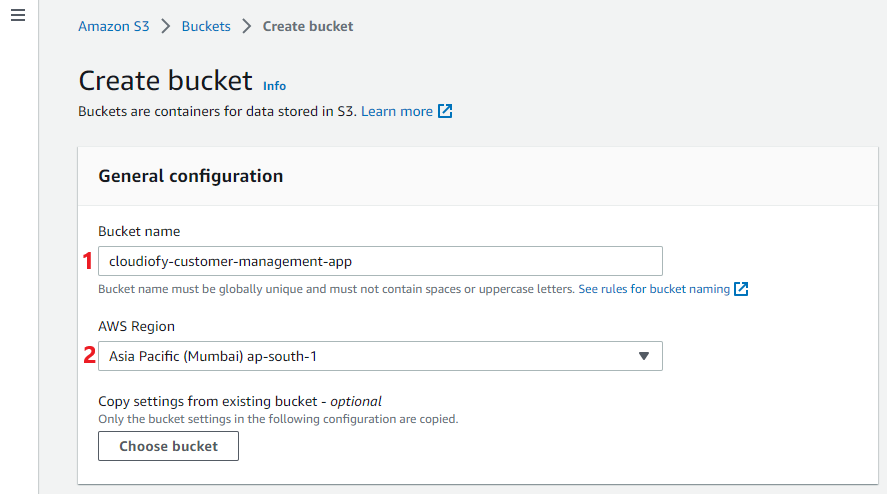
Create an S3 Bucket
- Log in to your
AWS Management Console. - Go to the
S3 service. - Click on the
Create bucketbutton. - Enter a
Bucket namefor your bucket. Make sure it’s unique, as bucket names must be globally unique across all of AWS. For example bucket name :cloudiofy-customer-management-app - Choose the
AWS regionfor your bucket and keep all other options as it is. Now, Click on theCreate bucketbutton
AWS S3 Website Hosting
Once you have created your S3 bucket, you can enable static website hosting. This will allow your S3 bucket to function as a web server and serve up your static website content. Here’s how to do it –
- In the S3 console, click on your newly created bucket

- Click on the
Propertiestab.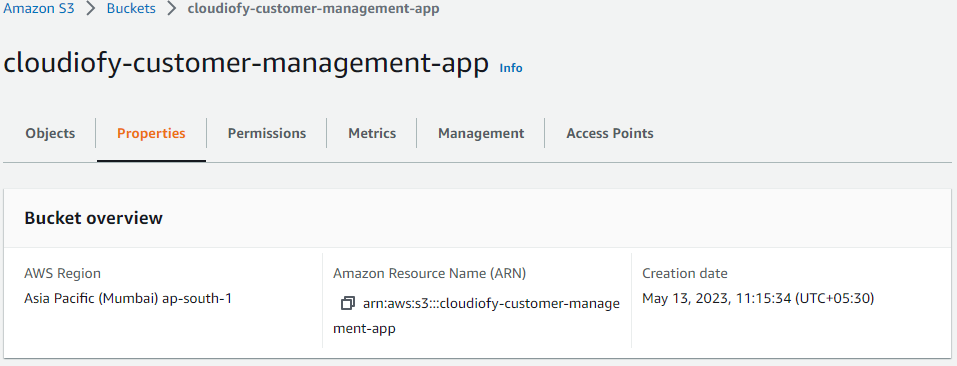
- Scroll down to the
Static website hostingsection and click onEdit.
- Select the
Enableoption. Enter the name of yourindex document(e.g. index.html) and the name of your error document (e.g. error.html) if you have one.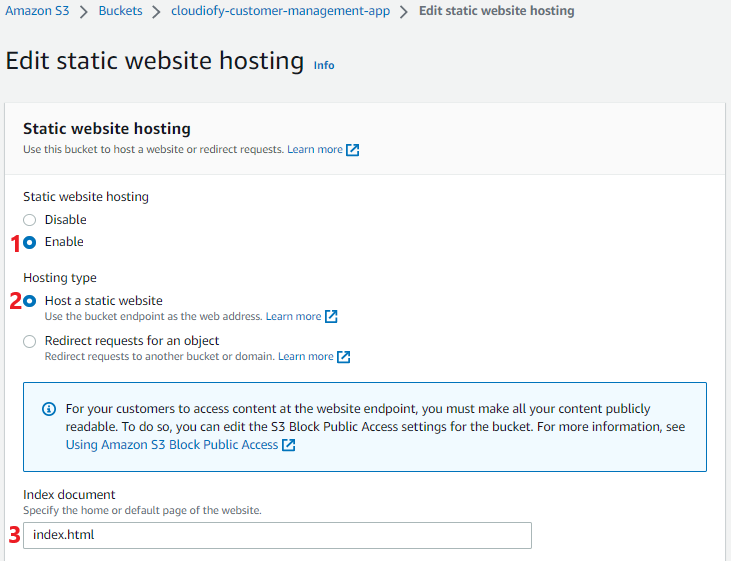
- Click on
Save changes.
Upload Website Files
Now that your S3 bucket is set up and ready to host your website, it’s time to upload your website files. Follow these steps to upload your files to S3 –
- In the S3 console, click on your bucket.
- Click on the
Uploadbutton. - Select the files you want to upload and click on
Upload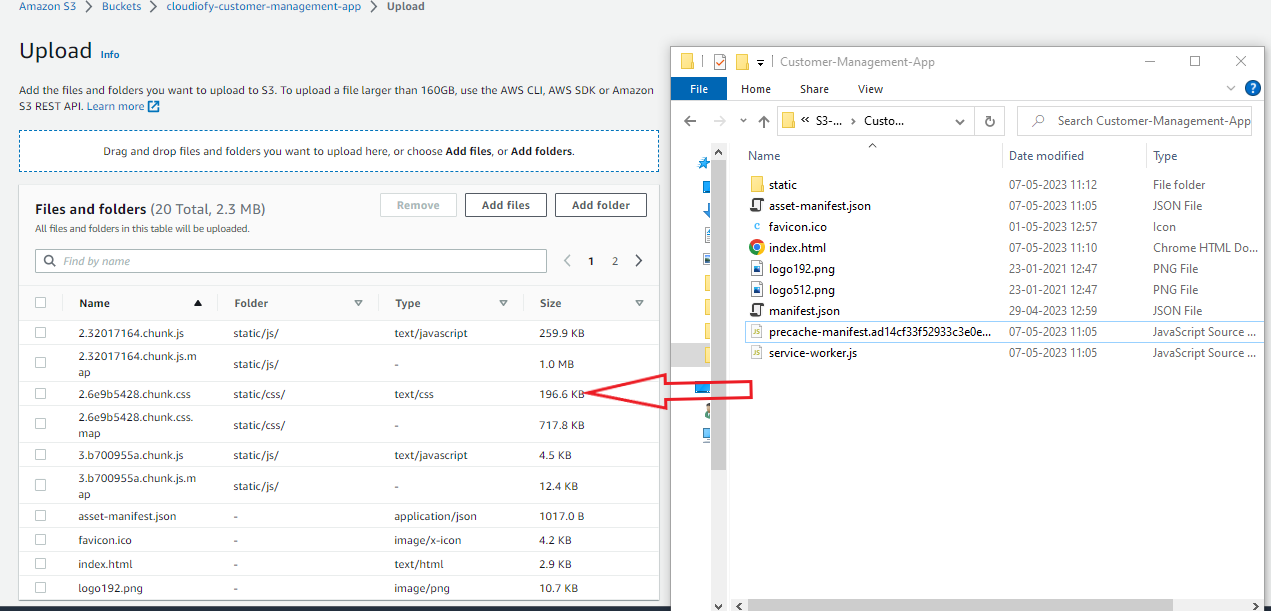
- Once your files have finished uploading, make sure they are set to public so they can be accessed by anyone visiting your website. Next step is to enable the S3 bucket content publicly accessible.
Configure Permissions To Set the S3 public access
To make sure your website is accessible to the public, you’ll need to configure the permissions for your S3 bucket. Here’s how to do it –
- In the S3 console, click on your bucket
- Click on the
Permissionstab Editblock public access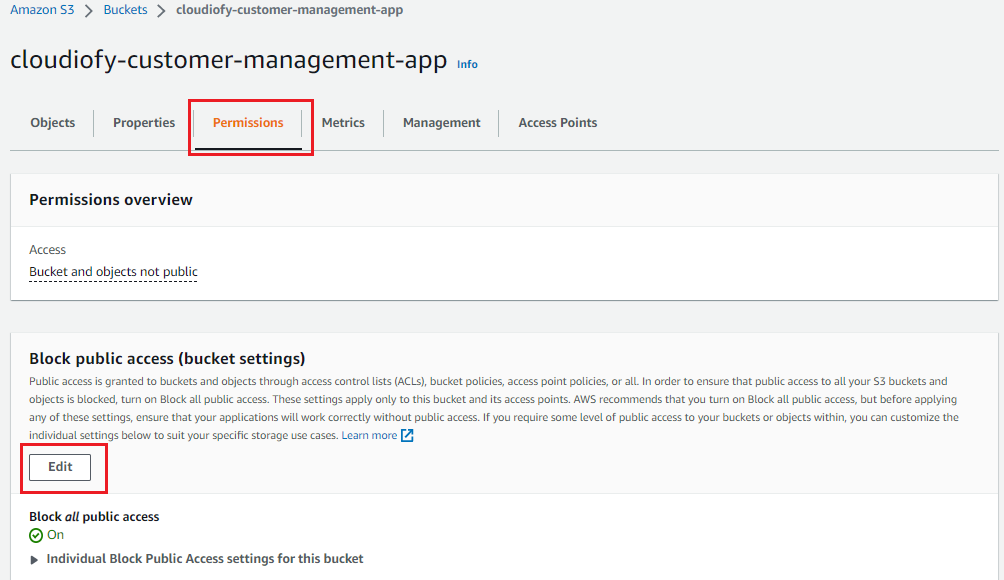
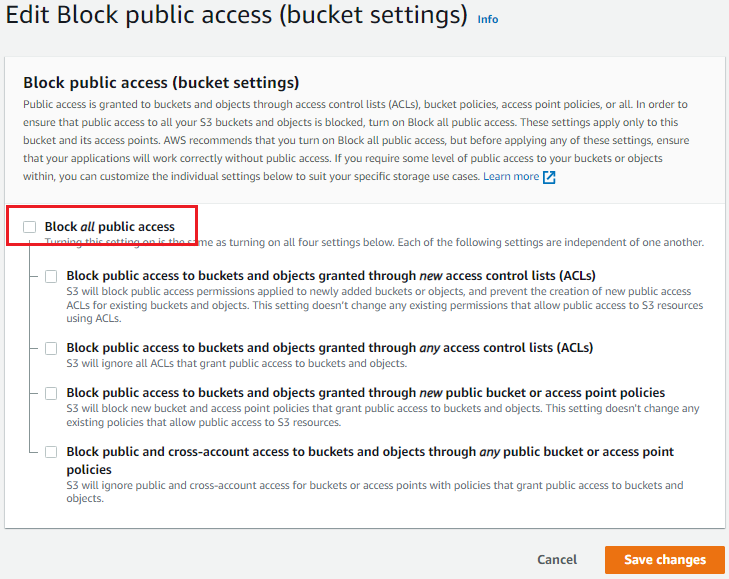
- Click on
Save changes. - Go back to
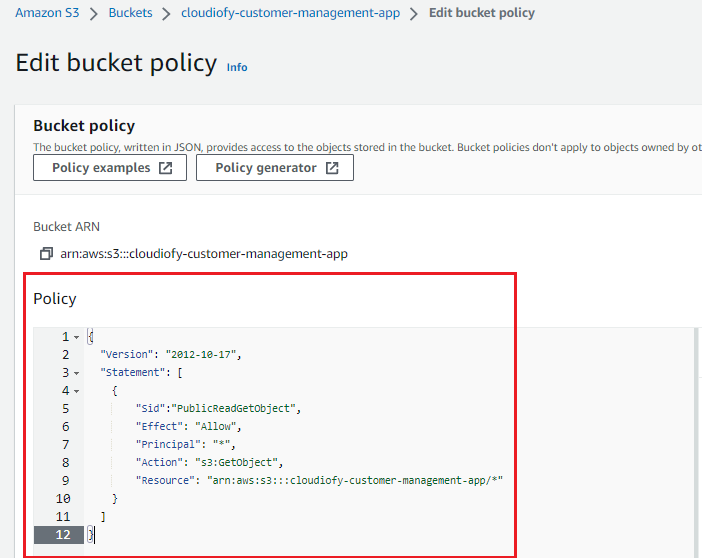
PermissionTab and Click onBucket Policy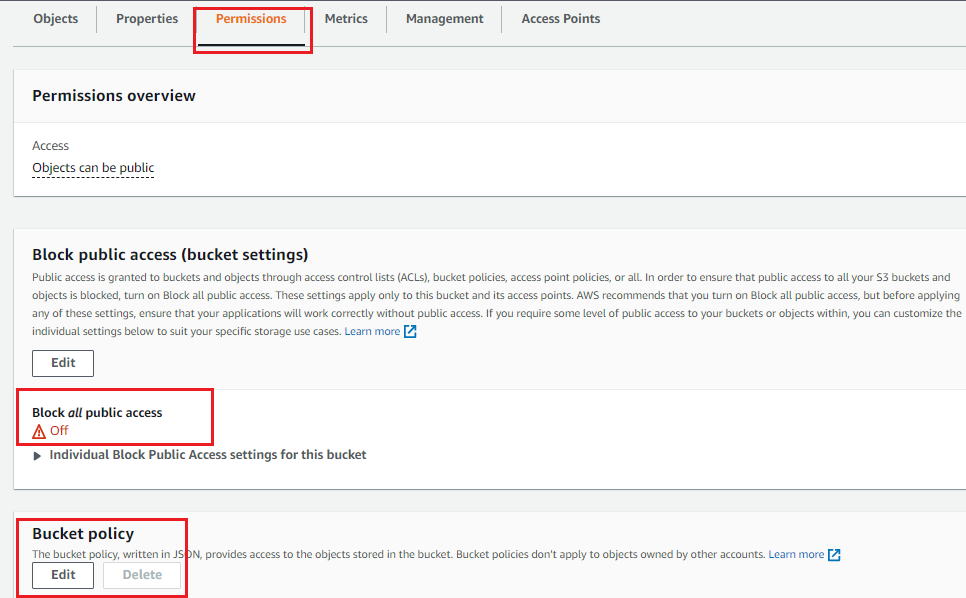
- Enter the following
policy. - Note –
Replace“your-bucket-name” with the name of your bucket in theResourcesproperty
{
    "Version": "2012-10-17",
    "Statement": [
        {
            "Sid": "PublicReadGetObject",
            "Effect": "Allow",
            "Principal": "*",
            "Action": "s3:GetObject",
            "Resource": "arn:aws:s3:::cloudiofy-customer-management-app/*"
        }
    ]
}
Now, Click on Save changes.
Step-3: Test your website
Once you have uploaded your website files and configured your permissions, it’s time to test your website. Simply enter the endpoint URL for your S3 bucket into your web browser, and your website should be live!

Website is hosted on AWS S3 bucket is live!
Conclusion
Hosting a static website on AWS S3 is an efficient and cost-effective solution for businesses and individuals. With the step-by-step guide provided in this AWS S3 website hosting tutorial, you can easily set up your own static website in no time. Remember to follow best practices such as enabling versioning, setting up proper permissions, and configuring your domain name for a secure and professional online presence. With AWS S3, you can have peace of mind knowing that your website is hosted on a reliable and scalable platform backed by Amazon’s infrastructure.
Securing your website content hosted in S3 bucket is important, you check this video to follow the S3 security best practices-
